
NOTE: This document was published by HID. The goal of this document is to describe the steps to prevent print information from peeling back on the credential
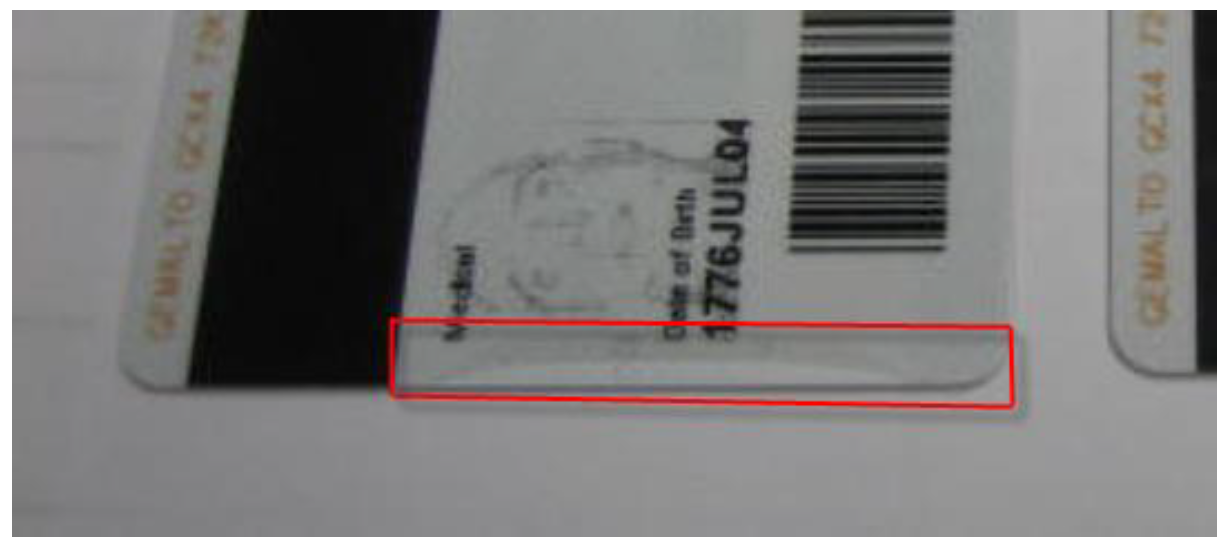
Analysis
Fargo has observed this type of failure before. The problem is the result of
delamination of the approximately 2 mil clear PVC dye receptive layer in the card
body. During the re-transfer of the image from the transfer film to the card body,
the heated roller is in contact with the leading edge of the card, and if the bonding
strength between the 2 mil clear layer and the card body is insufficient, the PVC
clear layer folds back causing the defect shown above.
Background:
The ISO 7810 standard states that a card shall possess minimum bond strength of 2
lbf/in between the weakest layers of the card construction. A bond strength that
does not meet this requirement has a higher tendency to fail during the
personalization process or shortly after it is issued to the user. A bond strength
greater than 2 lbf/in will provide higher durability and reliability for the printed
card.
The card manufacturing process can lead to variability in the bond strength of the
card. It has been shown that cards from the same batch of material can have
different bond strengths, depending on the location of the sheets at the time of
lamination (assuming a sheet lamination process). For example, sheets that are
farthest away from the hot lamination plates may not reach the required temperature
to achieve the required bond strength of the card layers. This may result in some
failures from the production run, even if a random sample of cards achieves the
minimum bond strength requirements. To accommodate the differences and ensure
the minimum bond strength is being met for all cards, the card manufacturer may
have to run a controlled experiment and measure the bond strength of all the sheets
at several locations on the sheet. This data can then be used to properly set the
lamination temperature, pressure and dwell time to produce an entire run of cards
that meet the minimum bond strength requirements.
Fargo’s reverse image printing process consists of two steps. The first step prints the color image onto an intermediate film. The printed image is then laminated, using a heated roller, to the surface of the card. The heat required to properly adhere the printed image to the card body can be warm enough to soften the card and allow the top surface of the card body to release from the rest of the card. (This is often referred to as delamination.) Delamination has been proven to happen more frequently on cards with lower bond strength between the card layers. As a result, Fargo prefers minimum peel strength of at least 3 lbf/in between the card layers. This increase in peel strength ensures the card layers will stay intact during the personalization process of the card. However, adjustments can be made to Fargo reverse image printers to transfer quality images onto cards that do not meet the ISO 7810 standard.
Recommendation:
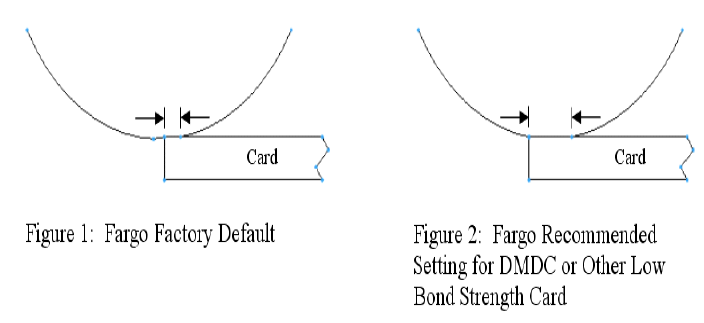
1. Our first recommendation is to make an adjustment to the HDP5000 print and transfer settings. Our testing indicates that if we move the point at which the transfer roller contacts the card approximately 0.025 in from the edge of the card body, the peel back failure is greatly diminished. Figures 1 and 2 below show the area of contact made by the heated transfer roller onto the card leading edge and card body as transfer begins. Standard HDP5000’s are configured from the factory to print full color, over-the-edge images. We recommend that for applications with low card bond strength to adjust the starting position of the transfer roller inward onto the card. This adjustment reduces the heat and pressures on the leading edge/corner that can cause delamination.
Set the transfer temp offset to 0 (zero)
o Printing preferences>Tool Box>Advanced settings
Set the film transfer cooling level to 4
o Printing preferences>Tool Box>Advanced settings
Adjust the TOF as follows
o Print Top of Form (TOF) = Current Value minus 25 (i.e. change current setting by -25)
o Transfer TOF = Current value plus 25 (i.e. change current setting by +25)
o Printing preferences>Tool Box>Advanced settings
NOTE: AFTER ALL THESE SETTINGS HAVE BEEN ADJUSTED, MAKE SURE TO REBOOT (Cycle power) THE PRINTER IN ORDER FOR THE SETTINGS TO TAKE AFFECT.