Post installation procedure for testing the printing feature with PCA.
|
|
|
|
|---|---|---|
|
|
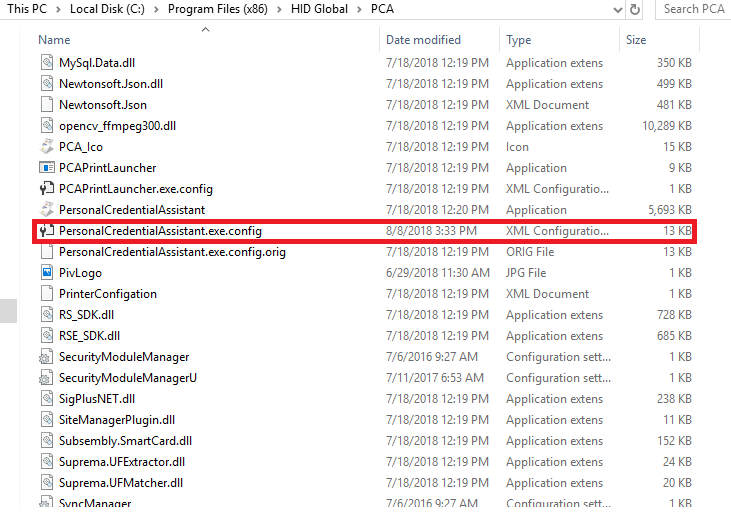
Back up the PCA configuration file Navigate to: "C:\Program Files (x86)\HID Global\PCA" then backup the "PersonalCredentialAssistant.exe.config" file. |
|
|
1 |
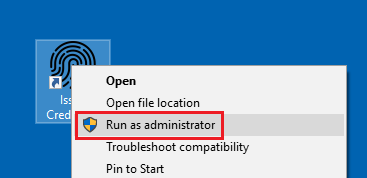
Run PCA as Administrator |
|
|
2 |
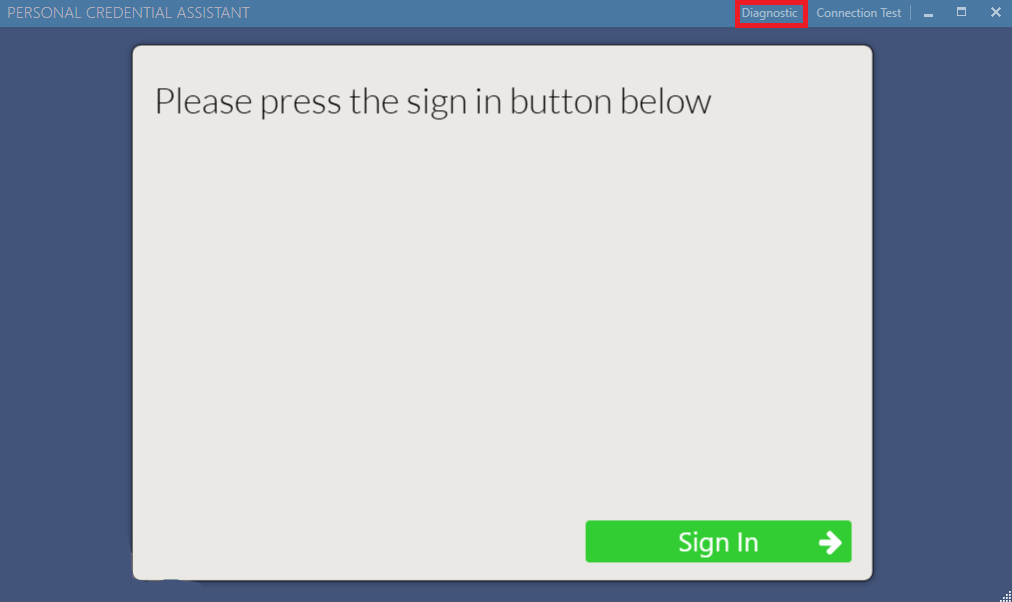
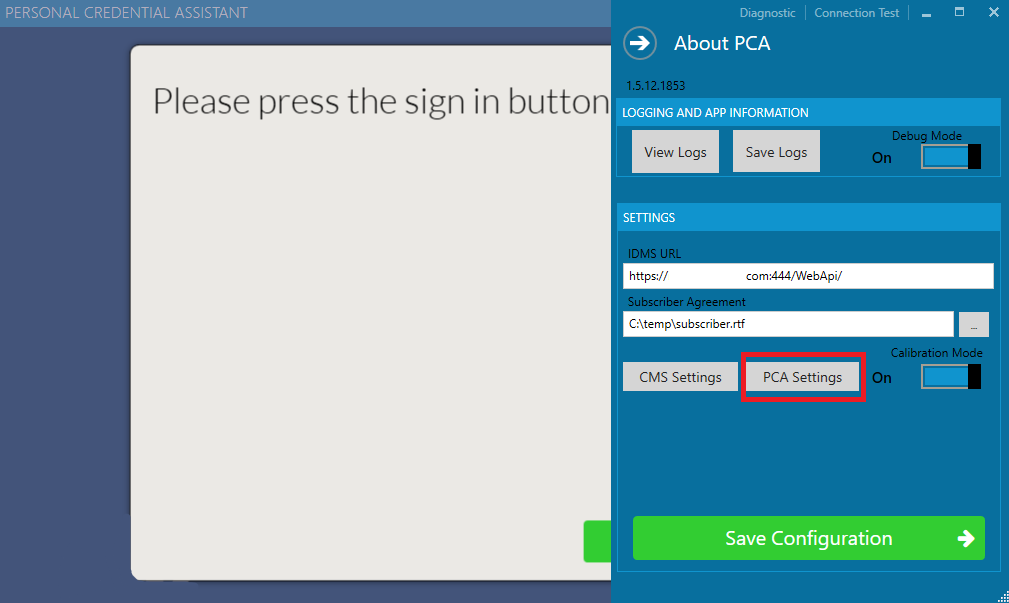
Click "Diagnostic" in top right corner. |
|
|
3 |
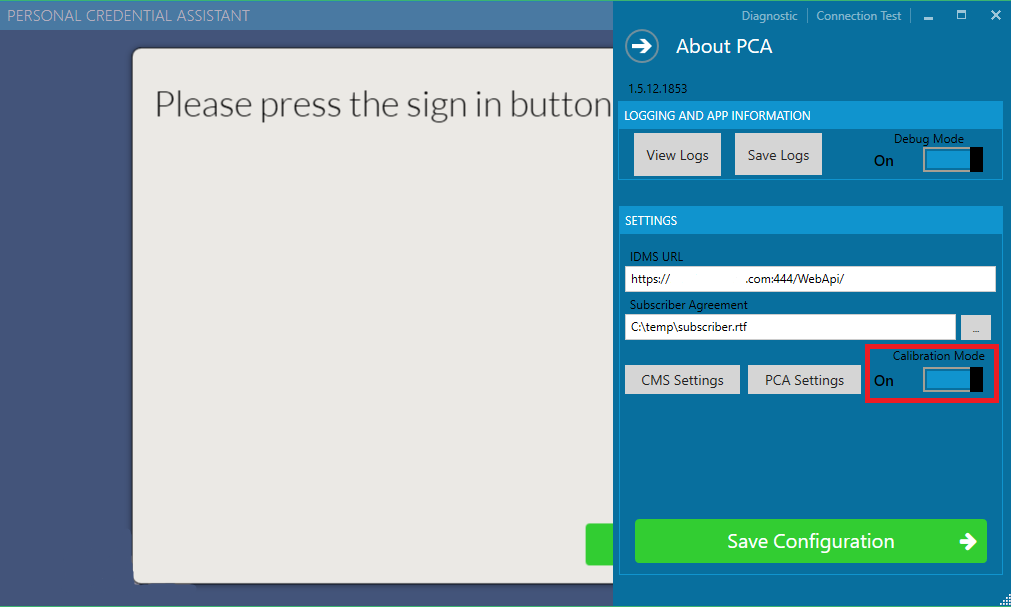
Click the calibration mode to be ON as shown. |
|
|
4 |
Click "PCA Settings" |
|
|
5 |
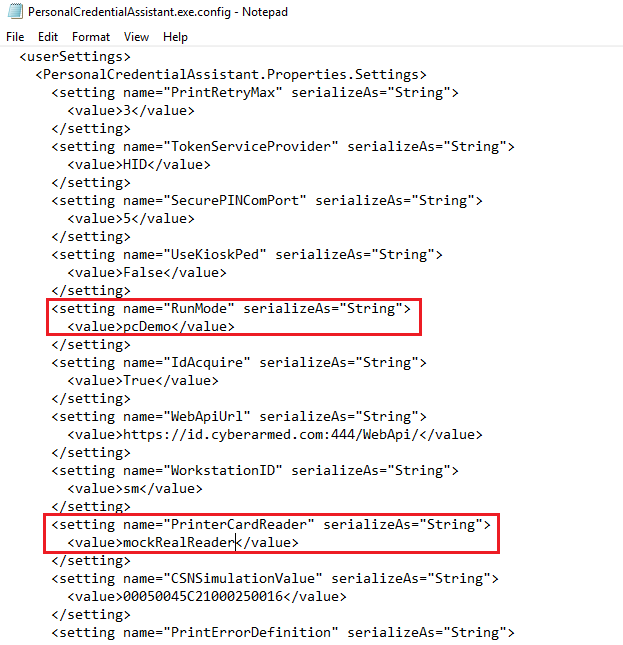
Change the "RunMode" Value to pcDemo as shown. Then, change the "PrinterCardReader" value to mockRealReader as shown. Save.
|
|
|
6 |
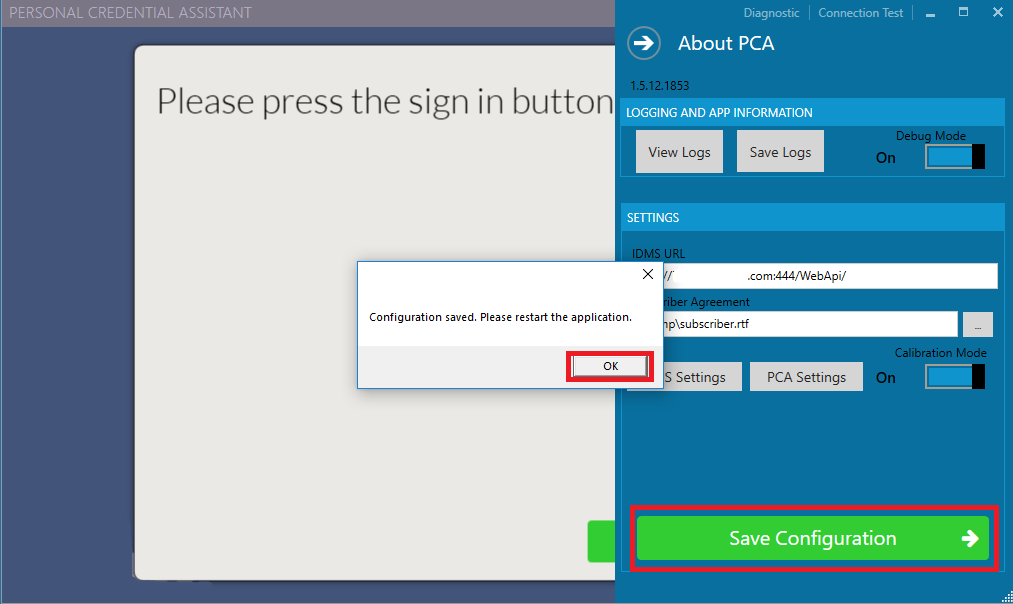
Click "Save Configuration" then restart PCA normally. |
|
|
7 |
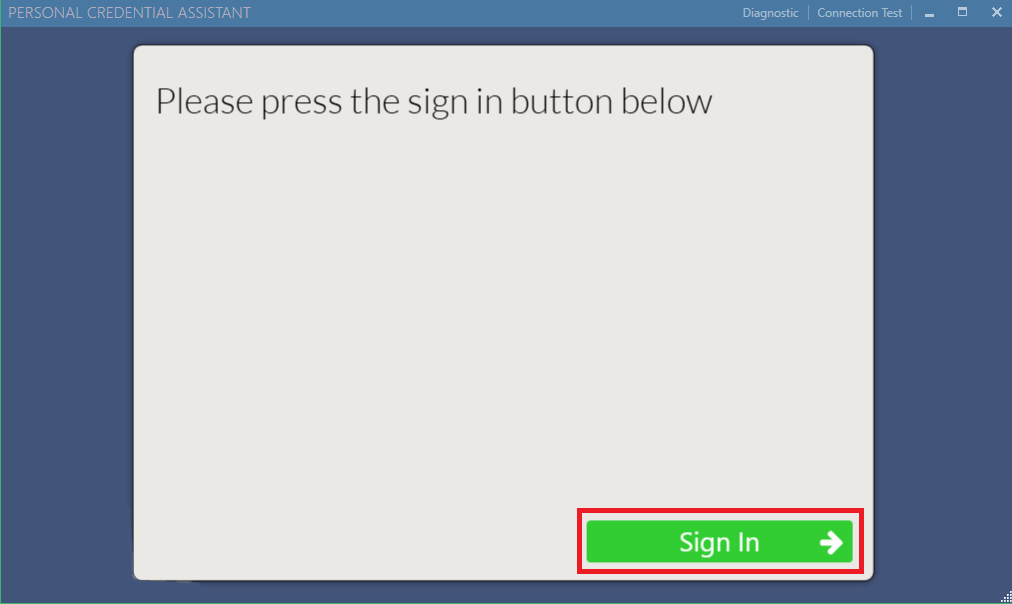
Click "sign in" |
|
|
8 |
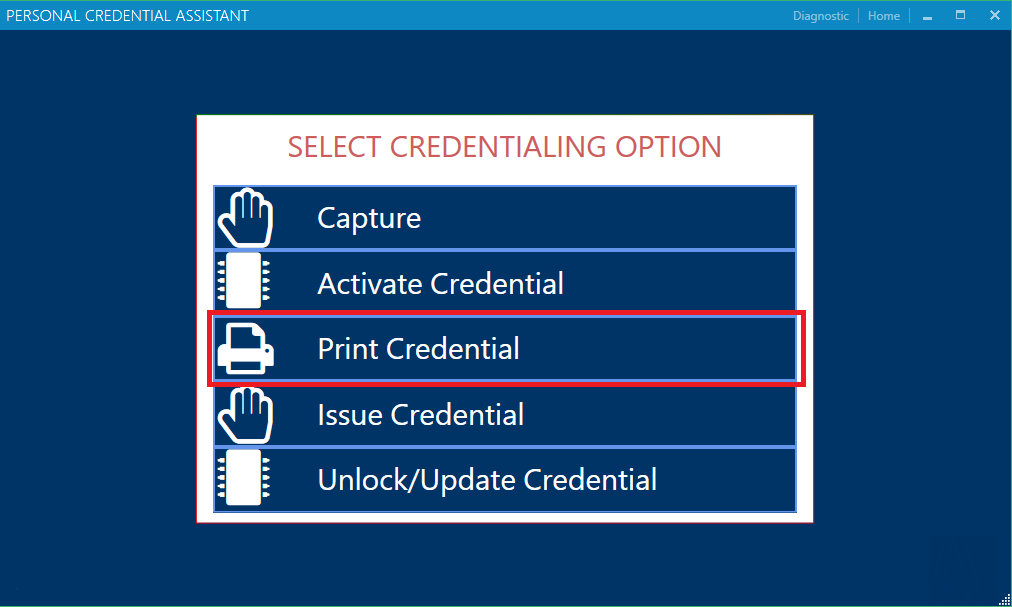
Click "Print Credential" |
|
|
9 |
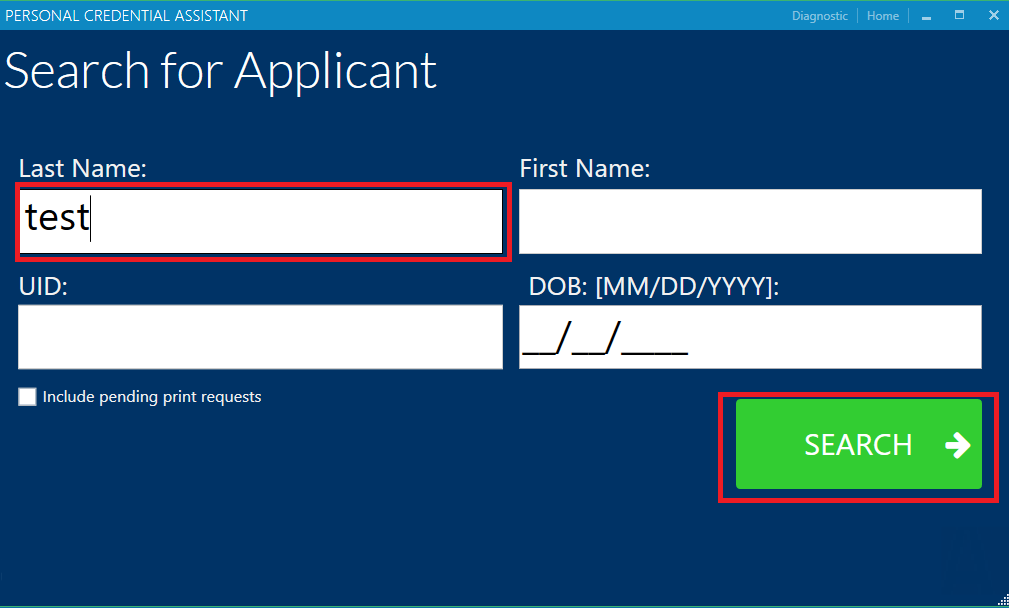
Search for "test" user. |
|
|
10 |
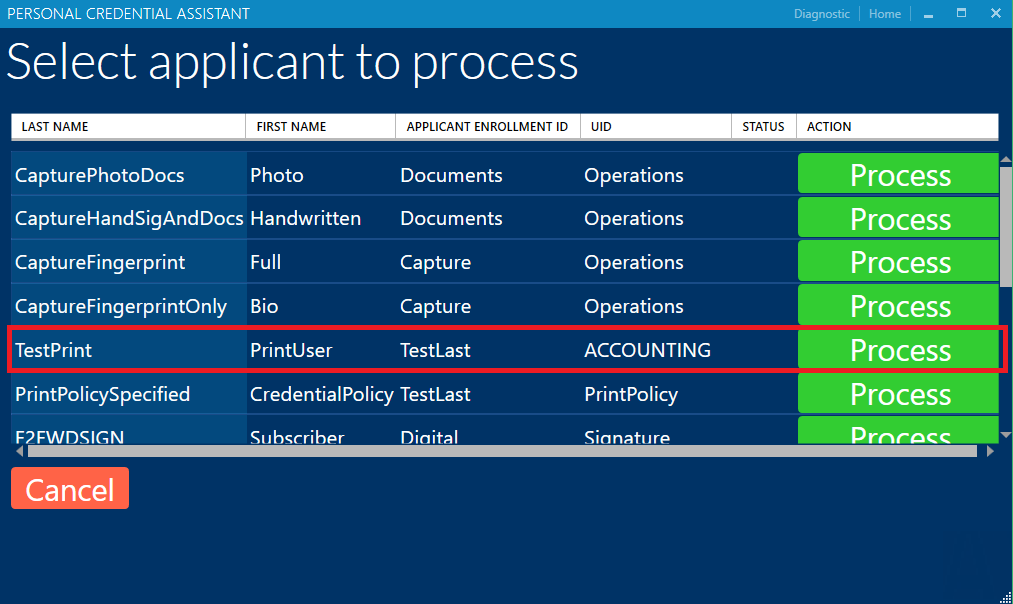
Select the "TestPrint" user, press "Process" |
|
|
11 |
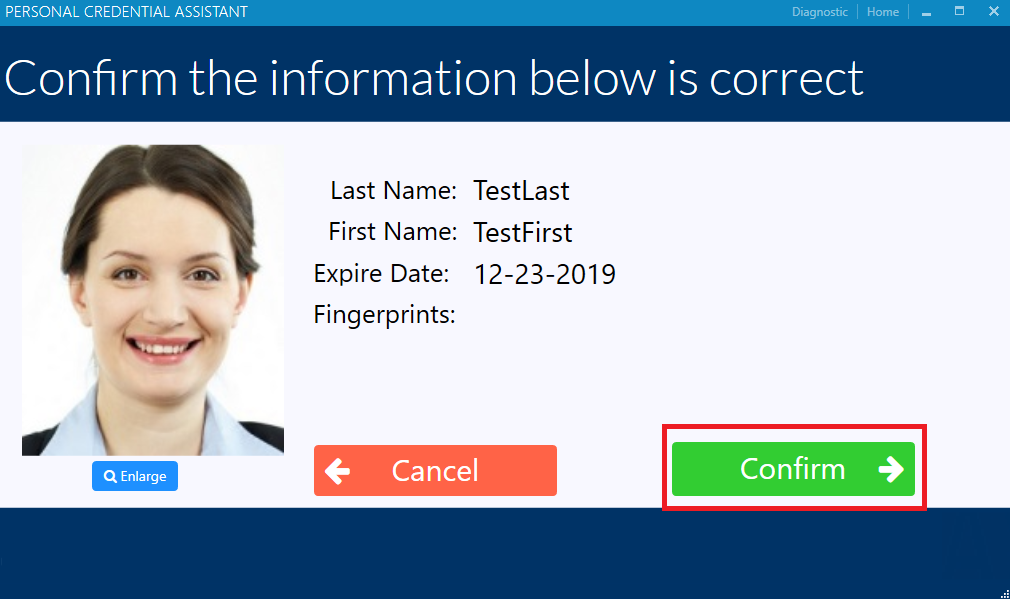
Click "confirm" |
|
|
12 |
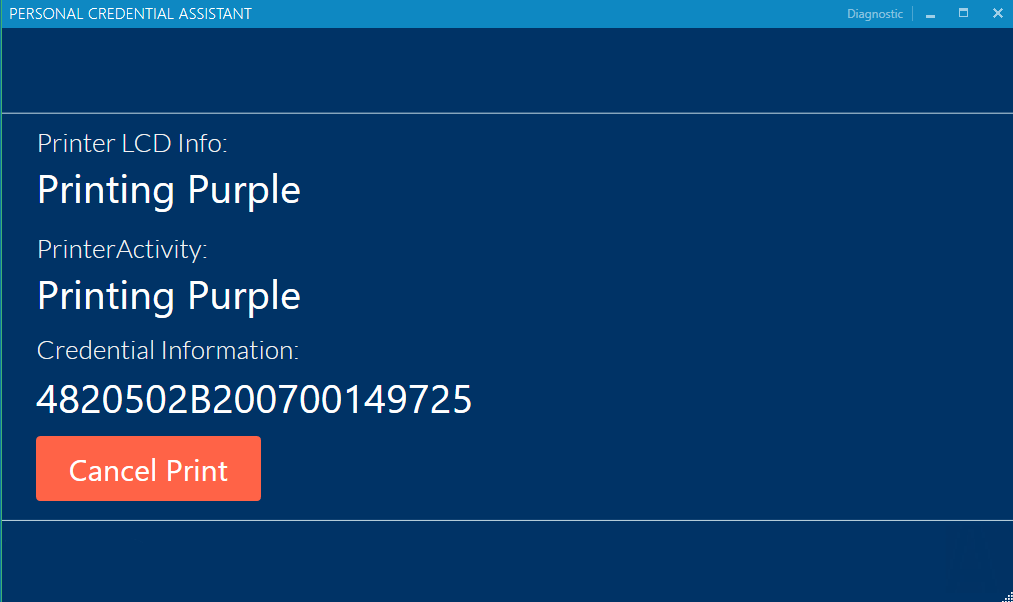
PCA should show different printing stages. An empty card should come out on the left side of the printer. |
|
|
13 |
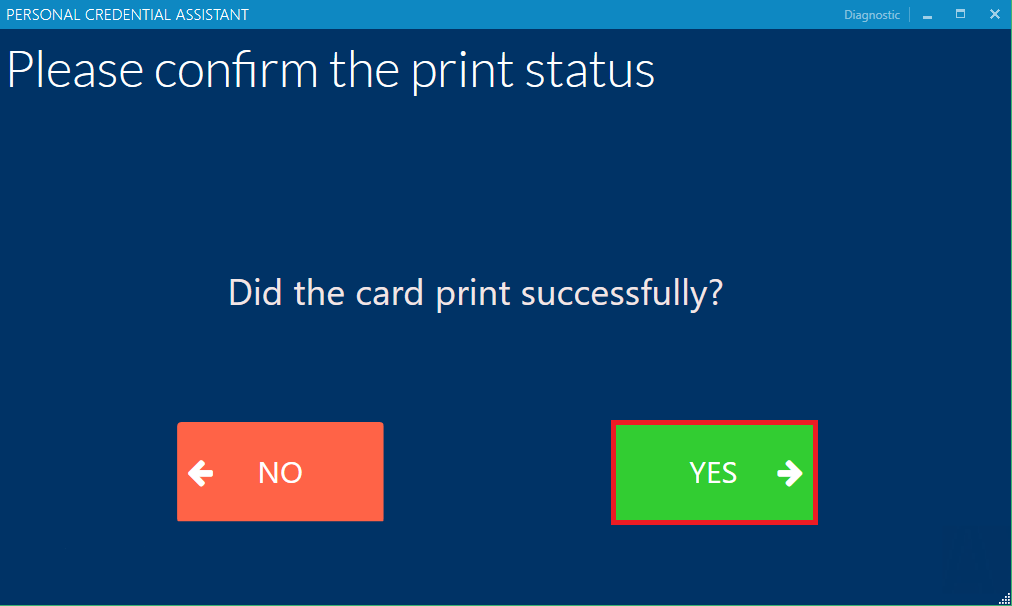
Click "Yes", then exit PCA. |
|
|
14 |
Restore the "PersonalCredentialAssistant.exe.config" Run PCA as Administrator Uncheck "calibration mode" Save and restart PCA. |
|