Configuring the AsureId print template
This process describes how to load the the print template for printing the credential.
Important:Template data requirements. Any new data template must implement the following data fields.
ID | Name | Description |
1 | HEADER | Information printed on top border of credential |
2 | EXPIRATION_DATE_SHORT | Expiration date |
3 | ORG_AFFILIATION_ABBREV | Organization Abbreviation |
4 | EMPLOYEE_AFFILIATION_LINE_1 | Line 1 of employee affiliation |
5 | EMPLOYEE_AFFILIATION_LINE_2 | Line 2 of employee affiliation |
6 | EXPIRATION_DATE_PI | Expiration date large font |
7 | Photo | Photo image of the card holder |
8 | FIRSTNAME | First name of the cardholder |
9 | LASTNAME | Last name of the cardholder |
10 | CONTRACTORBAR | Color bar of credential |
11 | AGENCYSEAL | Seal of the organization *For this to be operational, the seal must be saved in the PCA directory with the file name of pivilogo.jpg |
13 | PHYS_CHAR_HEIGHT | Height of the card holder |
| PHYS_CHAR_EYE_COLOR | Eye color of the card holder | |
14 | CARDSERIALNUMBER | Card serial number |
15 | ISSUER_IDENTIFICATION | If Present in the AsureId Policy, will print External ID. |
| 24 (Array Position) | FASCN_BAR_CODE_VALUE | Fascn from CMS |
Loading an existing card template
| Step | Description | Example | |
|---|---|---|---|
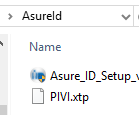
| 1 | Locate the PIVI.XTP file in the AsureId folder. |
| |
| 2 | Open the HID Asure Id Program | 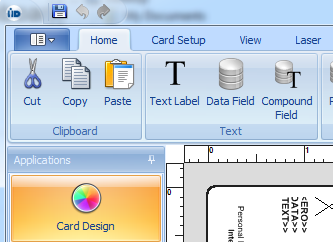 | |
| 3 | After the HID Asure Id program is opened, Press the icon that is near the top left corner. The icon has a small down arrow. | 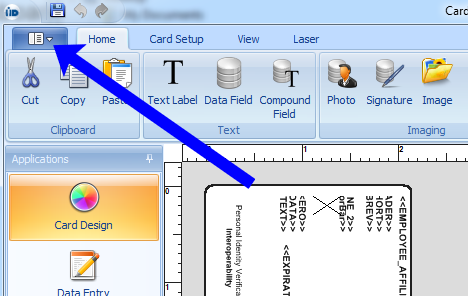 | |
| 4 | Next select Import/Export Import template from file | 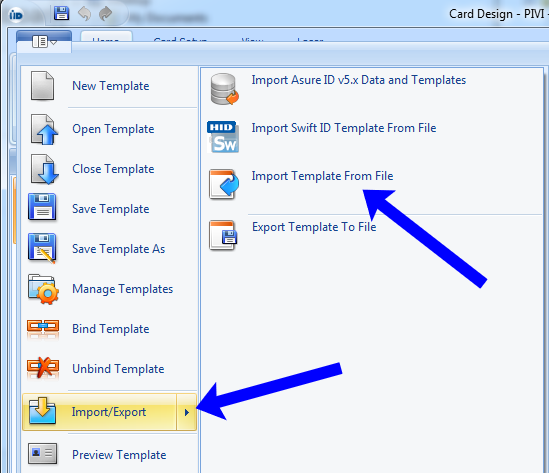 | |
| 5 | Select the PIVI.xtp file |
| |
| 6 | The layout will then be listed on the canvas | 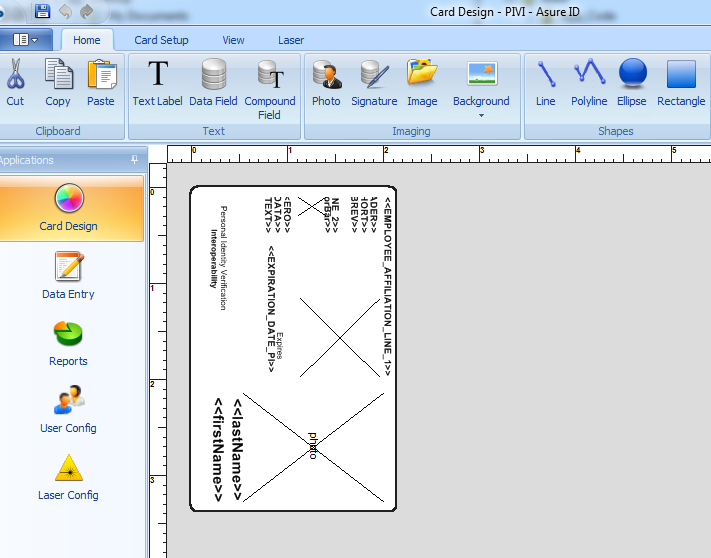 | |
| 7 | Press the save button and then close |  | |
| 8 | Restart PCA |
Adding the FASCN Bar code
Prerequisites
The IDMS card policy has been configured to retrieve the piv:printableFascn from the CMS
| Step ID | Procedure | Example |
|---|---|---|
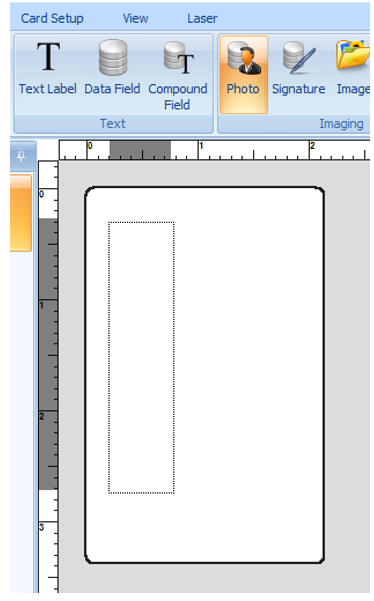
| 1 | In Asure ID, Click Photo and then draw a rectangle on the card canvas. |
|
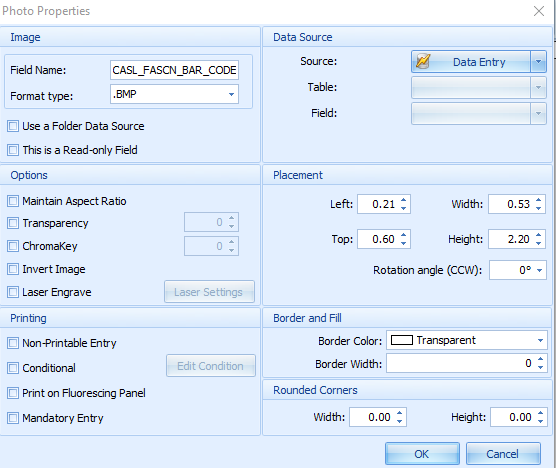
| 2 | Within the photo properties section, configure the following: Field Name: CASL_FASCN_BAR_CODE Format type: .BMP Width: .50 Height: 2.20 Rotation Angle 0 Maintain Aspect Ration : No check box. Border Color: Transparent Border Width: 0 |
|
| 3 | Position the object on the desired location. | |
| 4 | To print the text value of the bar code, on the Asure ID, click Data Field |
|
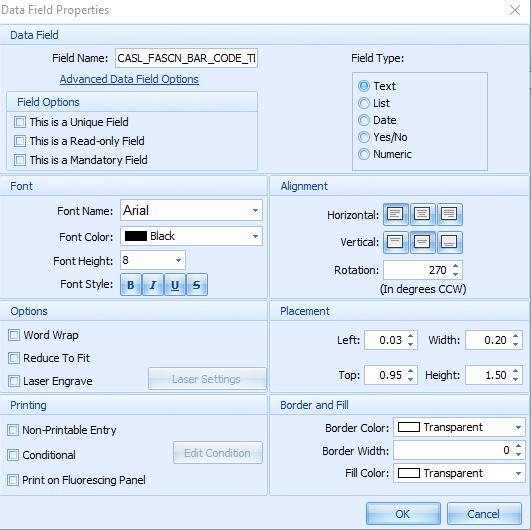
| 5 | Within the data field properties, configure the following: Field Name: CASL_FASCN_BAR_CODE_TEXT Font: Arial Font height:8 Rotation: 270 |
|

Adding the P2000 FASCN Bar code
The steps below describe how to configure the AsureId print policy to print the FASCN in a bar code.
Prerequisites
The IDMS card policy has been configured to retrieve the piv:printableFascn from the CMS
| Step ID | Procedure | Example |
|---|---|---|
| 1 | In Asure ID, Click Photo and then draw a rectangle on the card canvas |
|
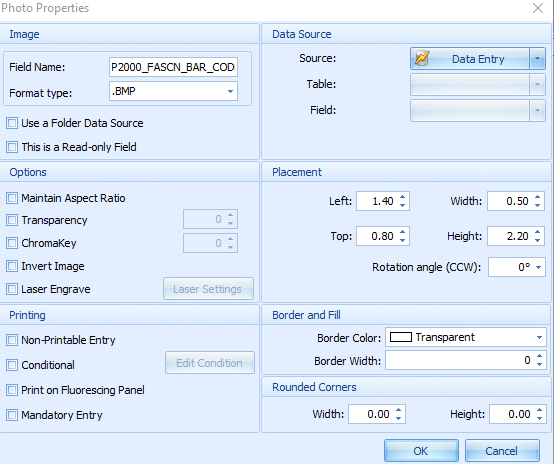
| 2 | Within the photo properties section, configure the following: Field Name: P2000_FASCN_BAR_CODE Format type: .BMP Width: .50 Height: 2.20 Rotation Angle 0 Maintain Aspect Ration : No check box. Border Color: Transparent Border Width: 0 |
|
| 3 | Position the object on the desired location. | |
| 4 | To print the text value of the bar code, on the Asure ID, click Data Field |
|
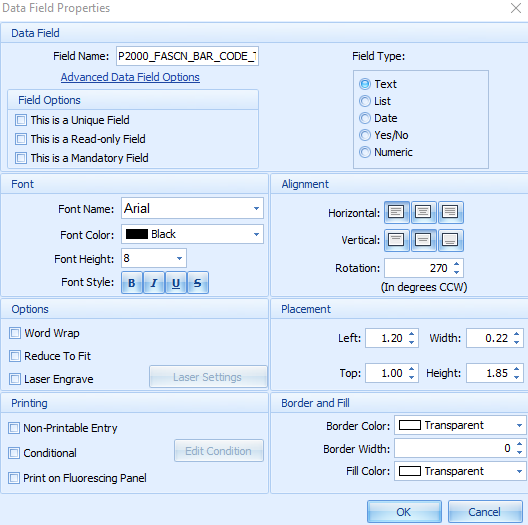
| 5 | Within the data field properties, configure the following: Field Name: P2000_FASCN_BAR_CODE_TEXT Font: Arial Font height:8 Rotation: 270 |
|