
DataStar connects to the IDMS API using a digital certificate.The following procedures describe register a new PFX with DataStar.
|
Procedure |
Example |
|
|---|---|---|
|
1 |
Go to Log in to IDMS, click operators. Locate the user created for DataStar. Copy the thumbprint value. |
|
|
2 |
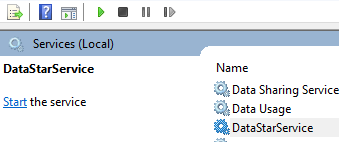
Go to the Services Management console, stop the DataStarService |
|
|
3 |
Go to the C:\Program Files (x86)\CyberArmed\DataStar folder |
|
|
4 |
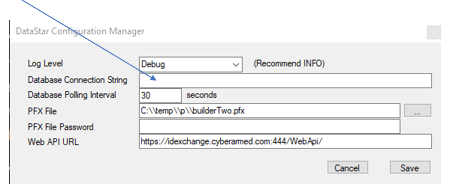
Run the DataStarConfigurationManager.exe application |
|
|
5 |
In the PFX file, update the path to the new PFX file that was created. In the PFX file password, enter the password to the PFX. |
|
|
6 |
Press Save |
|
|
7 |
Go back to the IDMS, click operators. Locate the user created for DataStar. Click Manage |
|
|
8 |
Go to the Services Management Console and start the DataStarService. Verify the thumbprint is the same thumbprint that was documented in step one (to ensure the correct user account is being updated). |
|
|
9 |
Click update thumbprint. Insert the thumbprint from the new PFX into the Thumbprint field. Press update Thumbprint. Press Update roles |
|
|
10 |
Go to the Services Management console, start the DataStarService |
|
|
11 |
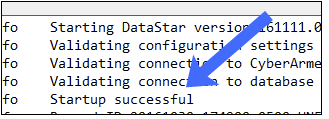
Next, go to the C:\Program Files (x86)\CyberArmed\DataStar directory and view the DataStar_LogFile file. |
|
|
12 |
Verify start up was successful. |
|