
In the event the database needs to move moved to a different server, the following procedures can be used.
Warning: It is critical that the current database is backed up and prepared for restoration in the event the database move fails. If the IdExchange database is corrupted or damaged, IdExchange may no longer operate and could possibly require the processing all users again. Additionally, it is critical that the exported data be protected and secured if being stored and/or transmitted.
Create a secondary database instance and backup the existing database
|
Procedure |
Example |
|
|---|---|---|
|
1 |
Perform the steps outlined in the "create database" section of this install guide. |
|
|
2 |
Verify that the database in step one can be accessed and is operational. |
|
|
3 |
Using Microsoft SQL Management Studio, connect to the existing IdExchange database. |
|
|
4 |
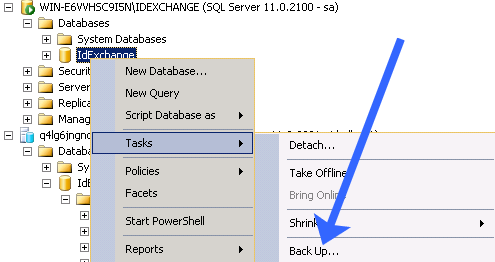
Right click on the IdExchange database and select "Back Up...". |
|
|
5 |
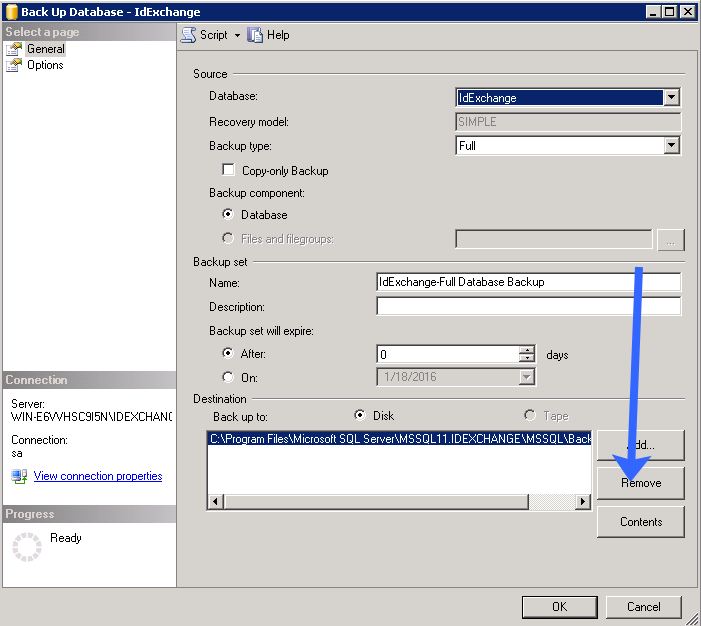
If there are any existing Destination paths, click the Remove button. |
|
|
6 |
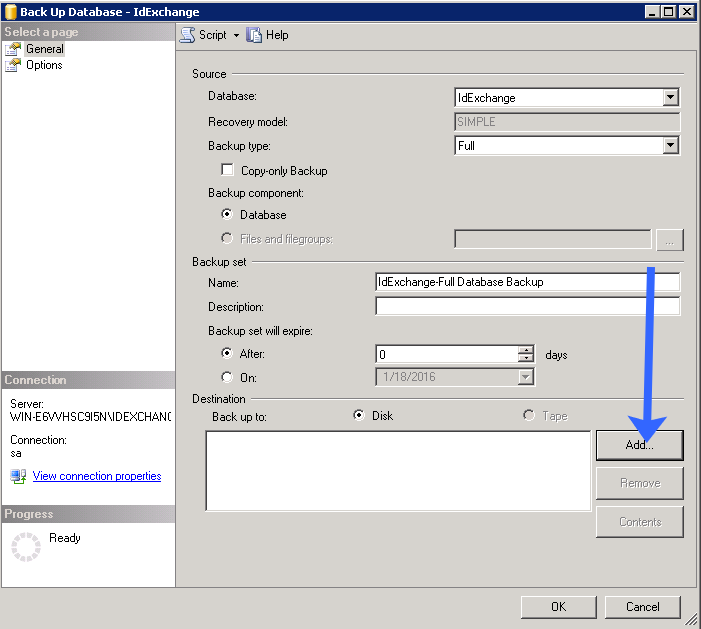
Next, in the destination section, select "Add". |
|
|
7 |
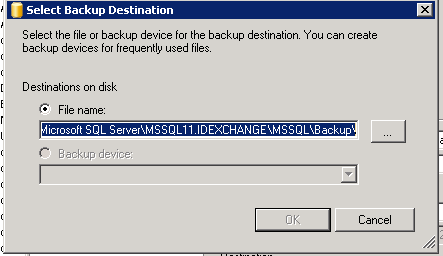
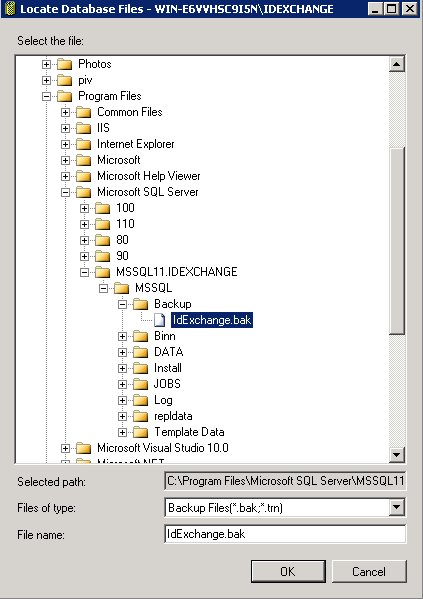
When the backup destination appears, select the backup destination folder and provide a name for the backup file.
After providing a name, press OK. |
|
|
8 |
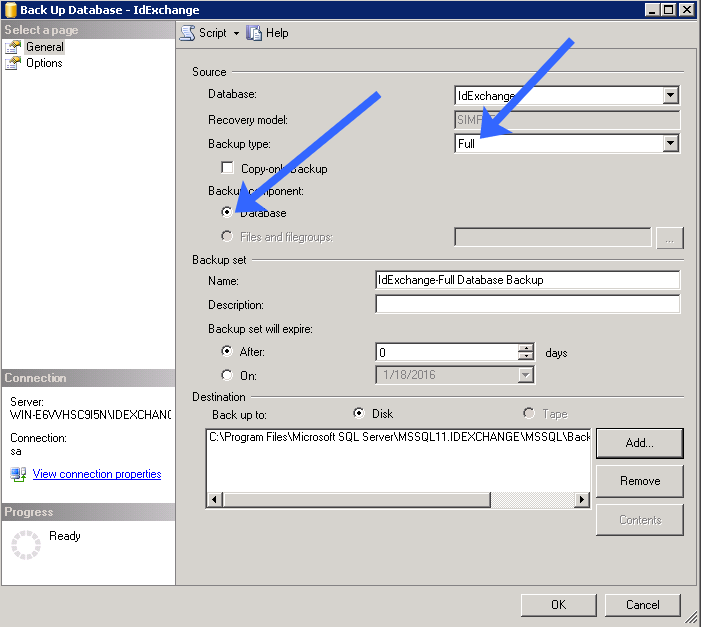
In backup types, select Full. Backup component select "Database".
Next, press the OK button. |
|
|
9 |
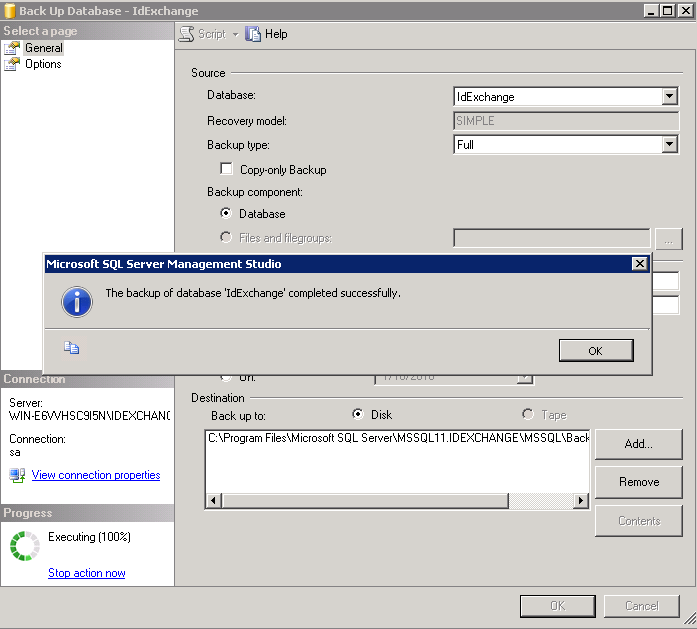
When complete, the dialog screen will show a status of the backup. |
|
Restoring the database
This process will restore the database that was backed up in the previous step. Once complete, the new database can be used for operations.
|
Procedure |
Example |
|
|---|---|---|
|
1 |
Connect to the secondary database using Microsoft SQL Studio. |
|
|
2 |
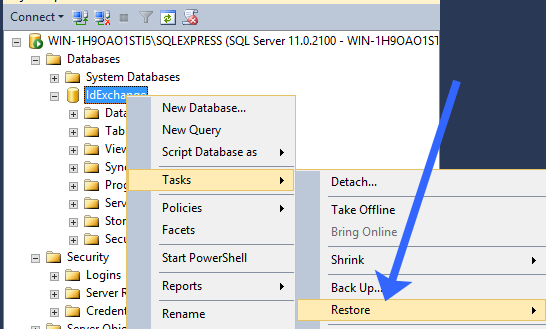
Right click on the IdExchange database that was created when creating the secondary database. |
|
|
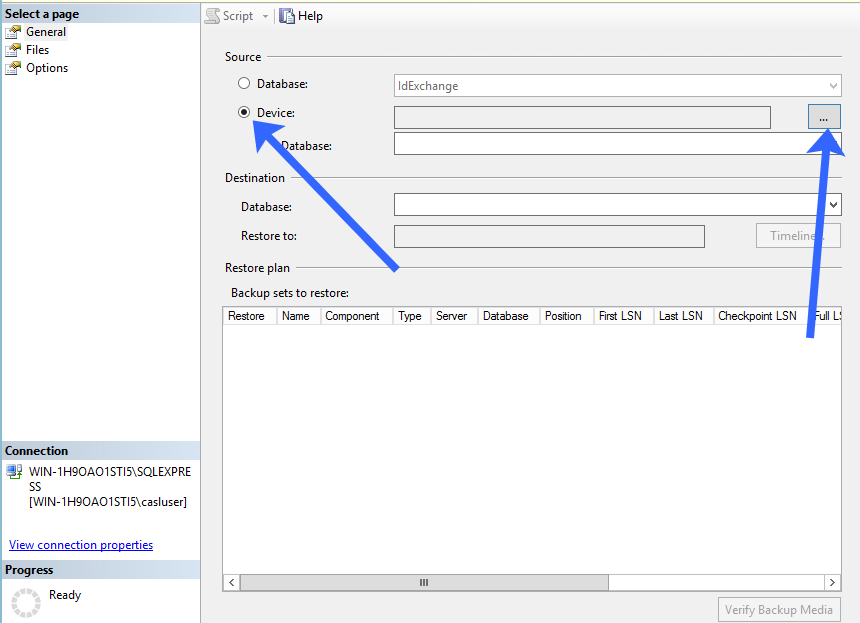
3 |
Select the device radio button, Next select the IdExchange Backup File. |
|
|
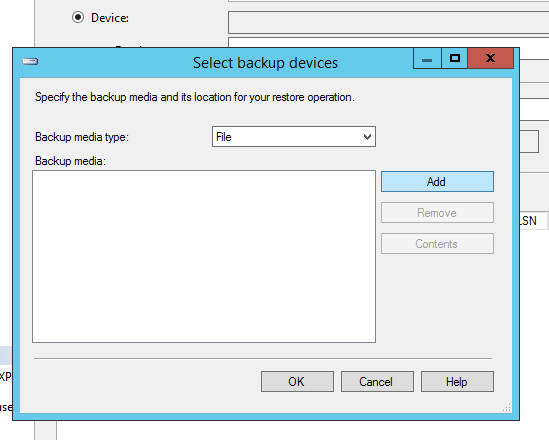
4 |
Select file backup devices and add. From here, locate the IdExchange Backup File. |
|
|
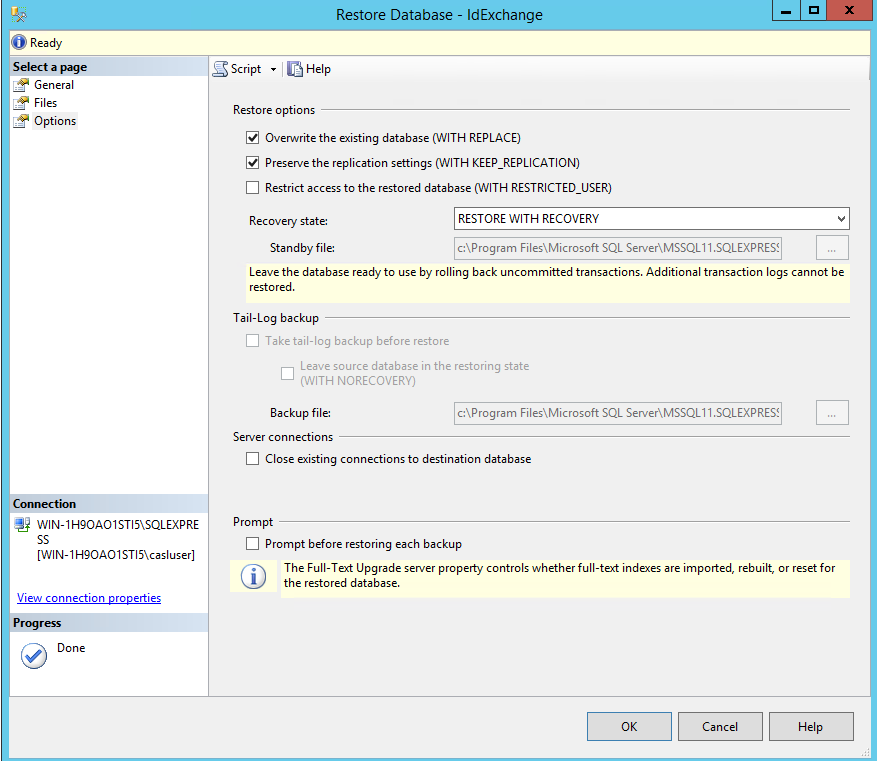
5 |
After the file has been located, go to the Options tab. Select Overwrite the existing database (WITH REPLACE). Select Preserve the Replication Settings (WITH KEEP_REPLICATION). Press OK. |
|
|
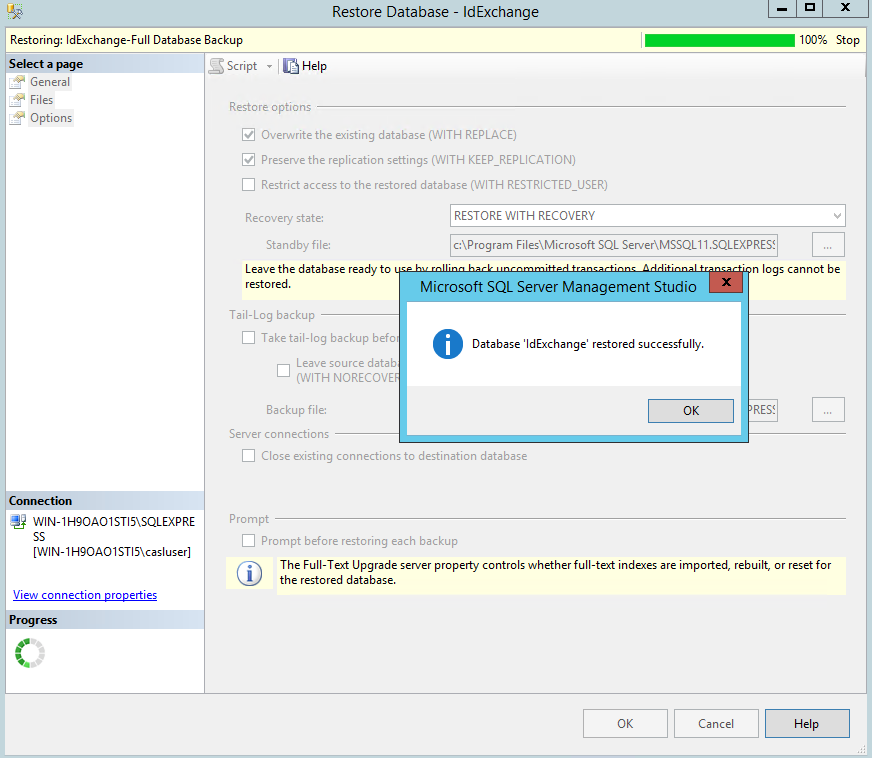
6 |
When complete, Microsoft SQL Studio will provide a status message. |
|
|
7 |
The database move is complete. |
|
Configure IdExchange to point to the new Database
Now that the new database is operational, the next step is to configure IdExchange to use the new database.
|
Procedure |
|
|
|---|---|---|
|
1 |
Go to the IdExchange Server. Go to the C:\IdExchange\WebApi folder. Decrypt and Edit the Web.config. |
|
|
2 |
Update the "DefaultConnection", "IdentityDbContext" and "CredentialContext" to point to the new database. |
|
|
3 |
Restart IIS. |
|
Securely Delete IdExchange backup file
It is recommended that the IdExchange backup file that was used to perform the database move process be securely deleted and destroyed.