
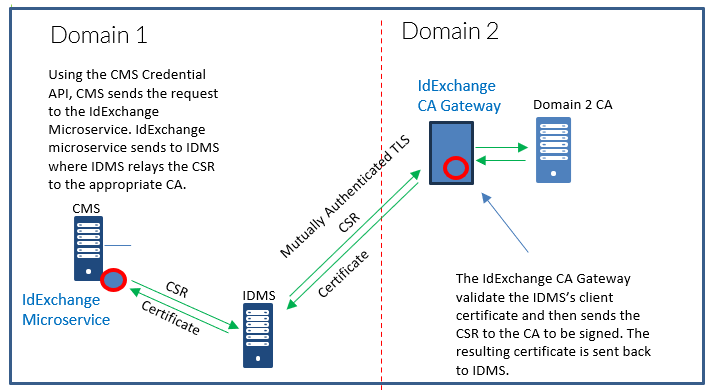
The IdExchange CA Gateway is used to connect the CMS and IDMS to a non-joined domain CA or a CA that is not on the same network as IDMS. There are 3 core configurations
-
Installing the SSL Certificate
-
Specifying the authorized client certificate (this will be the client certificate that is permitted to access the API)
-
Configuring the IdExchange microservice to run as a CA Gateway.
For concepts and additional configuration guidance, refer to the following:
IdExchange CA Gateway Overview
Configuring the IDMS to connect to the IdExchange CA Gateway
Installing the SSL Certificate
Verify that the port being used in the IdExchange service is also the one being used in the netsh commands. For example, use port 443 if the CA Gateway runs on 443 or use port 9098 if CA gateway runs on port 9098.
-
Display the currently configured SSL certificate with the command: “netsh http show sslcert 0.0.0.0:9098”
-
Review the output. If the output says “The system cannot find the file specified”, the SSL certificate has not been configured. If output displays a list of information, including the Certificate Hash field, an existing certificate exists. Proceed to the “Replacing the SSL Certificate” section below.
-
Install the certificate and private key (PFX) into the Local Computer\Personal\Certificates store.
-
Prepare the installation command by updating the certificate hash value with the thumbprint value of the SSL certificate. In this example, the SSL thumbprint is “745a0d2dc2bf3749fb0c89529d186d7ca9737a61 “. The final SSL installation command is ”netsh http add sslcert ipport=0.0.0.0:9098 certhash=745a0d2dc2bf3749fb0c89529d186d7ca9737a61 appid={00112233-4455-6677-8899-AABBCCDDEEFF} clientcertnegotiation=enable”
-
Using an admin command prompt, execute the following command “ netsh http add sslcert ipport=0.0.0.0:9098 certhash=745a0d2dc2bf3749fb0c89529d186d7ca9737a61 appid={00112233-4455-6677-8899-AABBCCDDEEFF} clientcertnegotiation=enable “
If the error “ SSL Certificate add failed, Error: 1312 A specified logon session does not exist. It may already have been terminated.” is encountered, verify that the SSL certificate is correctly installed into the Local Computer\Personal\Certificates store
Replacing the SSL Certificate
If an existing SSL certificate has been installed and needs to be replaced, the first step will be to delete the existing certificate.
-
Display the currently configured SSL certificate with the command: “netsh http show sslcert 0.0.0.0:9098”
-
Additionally, display all other SSL Certificate Bindings In use “netsh http show sslcert”. Note the different ports also run the command with the correct port “netsh http add sslcert ipport=0.0.0.0:9098 certhash=745a0d2dc2bf3749fb0c89529d186d7ca9737a61 appid={00112233-4455-6677-8899-AABBCCDDEEFF} clientcertnegotiation=enable“
-
Delete the SSL certificate with the command “netsh http delete sslcert ipport=0.0.0.0:9098”
-
Proceed to the section “Installing the SSL Certificate”
Update the IdExchangeSvc.exe.config
The IdExchangeSvce.Exe.Config file defines how the microservice operates and what certificate is authorized to access the service.
|
Setting |
|
|---|---|
|
Certificate Authorization The permit a client to call this service, the certificate serial number of the calling application must be registered in the CMS_OPERATOR_CertSerialNumber field. |
<add key="CMS_OPERATOR_CertSerialNumber" value="00bde59ce0fa26732e4b57ce3a21f0de77"/> |
|
In the UseMsmq, set value to no. |
<add key="UseMsmq" value="no"/> |
|
In the WebApiUrl, remove the value |
<add key="WebApiUrl" value=""/> |
|
In the WebHTTP Binding section, 
add: |
<binding name="security">
|
|
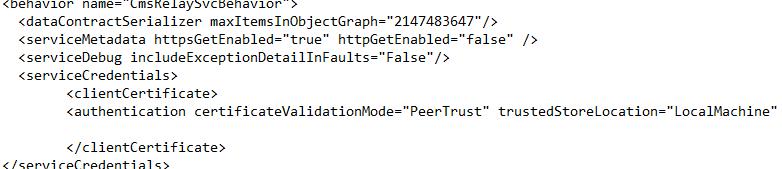
In the CmsRelaySvcBehavior, 
add: |
<serviceCredentials>
|
|
In the CmsRelaySvcBehavior, change:

|
<serviceMetadata httpsGetEnabled="true" httpGetEnabled="False"/> Final configuration
|
|
In the behaviorConfiguration="CmsRelaySvcBehavior" key

|
change: bindingConfiguration="security" <add baseAddress="https://localhost:9098/CmsRelay"/> Final configuration:

|
Updating the Client Certificate That Connects to the IdExchange CA Gateway
-
Go to the IDMS, Administration->System Connections
-
Locate the CA Gateway System
-
Press Configure
-
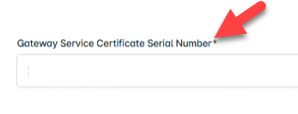
Review the Serial Number that is in the Gateway Service Certificate Serial Number Field
-
Go to the Local Computer Store, Personal Store and verify this is the serial number that needs to be changed.
-
Install the new Certificate into the Local Computer Store, Personal Store
-
Grant access the the private key to the IDMS Service
-
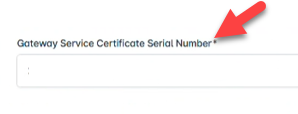
Update the IDMS, Gateway Service Certificate Serial Number with the serial number of the new certificate.
Update the IdExchange CA Gateway Configuration
-
Using the Certificate Serial Number that was configured in IDMS, open the IdExchangeSvce.Exe.Config
-
Review the CMS_OPERATOR_CertSerialNumber and ensure it is the same certificate as the previous certificate that was listed in the IDMS configuration.
-
Update the CMS_OPERATOR_CertSerialNumber with the new certificate serial number
-
Restart IdExchange
Troubleshooting
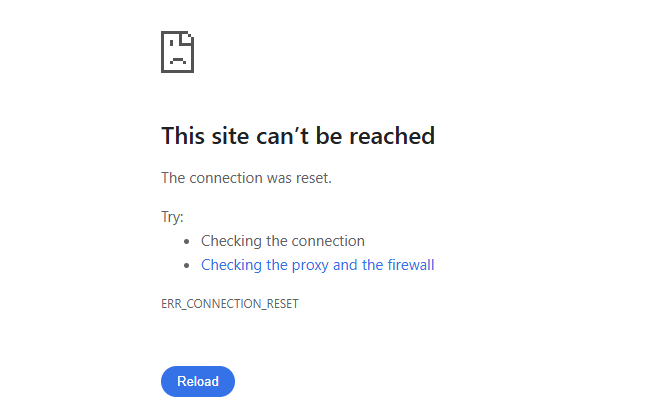
This site can’t be reached.
Usually a TSL/SSL issue. Verify that the TLS certificate is properly bound to the correct port.
Access to site was denied
Verify that the client certificate serial number set in the CMS_OPERATOR_CertSerialNumber of the IdExchangeSvc.exe.config is correct.