
Adding the Active Directory Connection
IDMS supports system connection to Microsoft Active Directory and other directories for automation and ease of use.
Prerequisites
-
System Administration user permissions are required. Role Definitions
Configuring the Connection
The following steps support the initial setup of the Active Directory
|
Item |
Procedure |
Example |
|---|---|---|
|
1 |
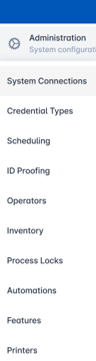
Login as with system administrator permissions. Click Administration then select System Connections. |
|
|
2 |
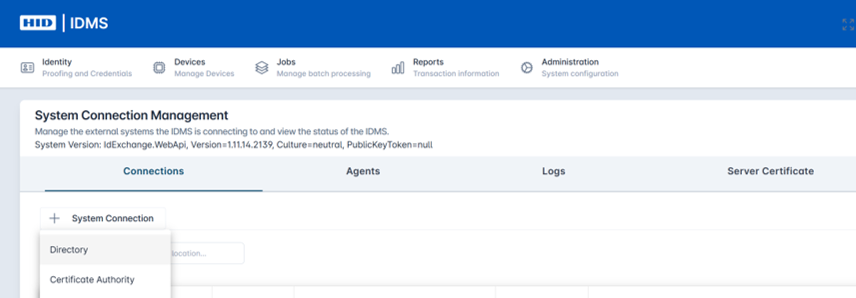
Click the + System Connection button and then select Directory from the drop down. |
|
|
3 |
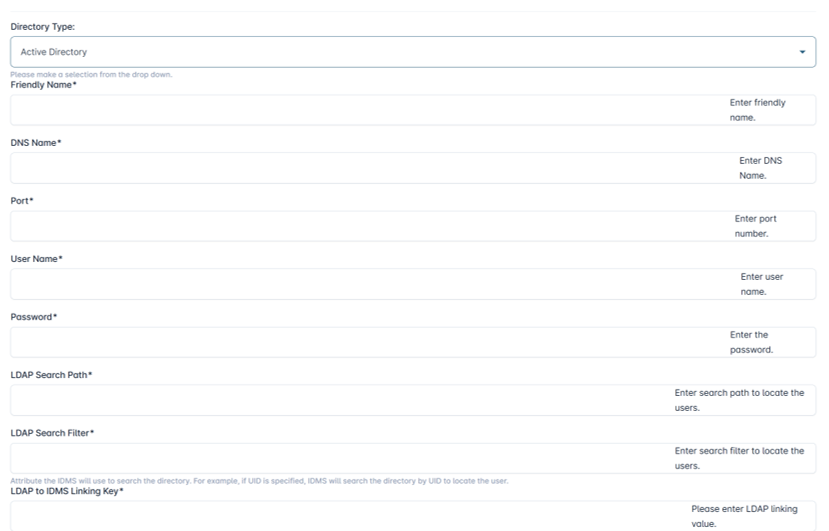
The Directory Connection screen displays. Complete the selection and enter information for the following attributes:
|
|
|
4 |
Once complete, select Add to setup the Active Directory connection. It will then display on the System Connection Management screen. |
|
|
5 |
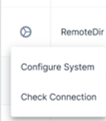
Then you can test the system connection. From the System Connections screen, click the gear button next to the listed Active Directory and then select Check Connection. You will see an update under the Health Check field showing status and timestamp of last check. |
|
Updating the Active Directory Password
The following steps support maintenance activities for the Active Directory connection
|
Item |
Procedure |
Example |
|---|---|---|
|
1 |
Click Administration then select System Connections. |
|
|
2 |
Locate the directory to be updated within the System Connection Management screen. Select the gear button, then the Configure System button. |
|
|
3 |
Update the Password field. Changes can also be made to other fields as needed for maintenance. Then press Update to save the changes. |
|
|
4 |
From the System Connections screen, locate the updated Active Directory, select the gear button and then then Check Connection option to run a test of the connection. You will see an update under the Health Check field showing status and timestamp of last check. |
|