IdExchange Applicant Directory
In cases where the user does not already exist in a company directory, the IDMS provides the ability to create the applicant and securely store its contents in the IDMS system.
How to Add the Applicant Directory
This guide outlines the steps to add a new system connection, specifically an "Internal Applicant Storage," to the IDMS. A system connection is an integration with an external system, which enables the IDMS to perform a specific function.
Steps: the system connection will first be added, then the ApplicantCreator role must be added for the operator. Role Definitions
Item | Procedure | Example |
|---|---|---|
1 | Navigate to System Connections From the main dashboard, click on the Administration. Then, select System Connections. | 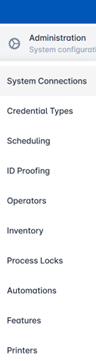 |
2 | Add a New System Connection On the "System Connection Management" page, click the + System Connection button located above the connections table. Select Internal Applicant Storage from the drop-down list. A confirmation dialog will pop up asking, "Would You Like To Add An Internal Applicant Storage System?" Note: If you have already setup the Internal Application Storage, it would not be displayed in the drop down; however, you can search for it via the search box. | 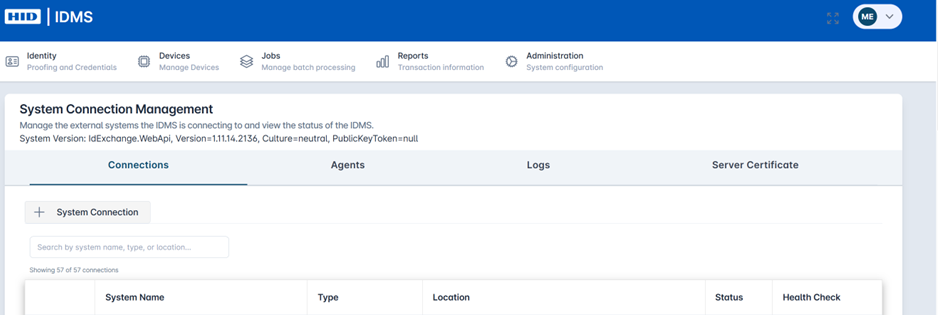 Adding a System Connection 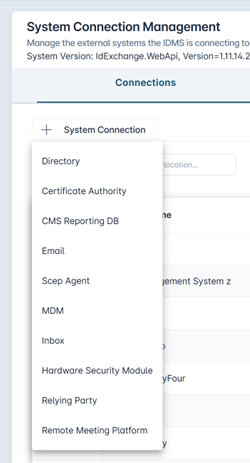 System Connection Management Drop Down  Search Previously Configured |
3 | Confirm and Create In the confirmation dialog, click Confirm. A new pop-up will appear, stating "System created." The pop-up will also notify that you must log out and log back in for the changes to take effect. Click Close to dismiss the pop-up. | |
4 | Add Operator Role: ApplicantCreator Go to Administration, then select Operator. Press the gear button to configure roles. Add the ApplicantCreatorOperator role using the selection button and arrows. | 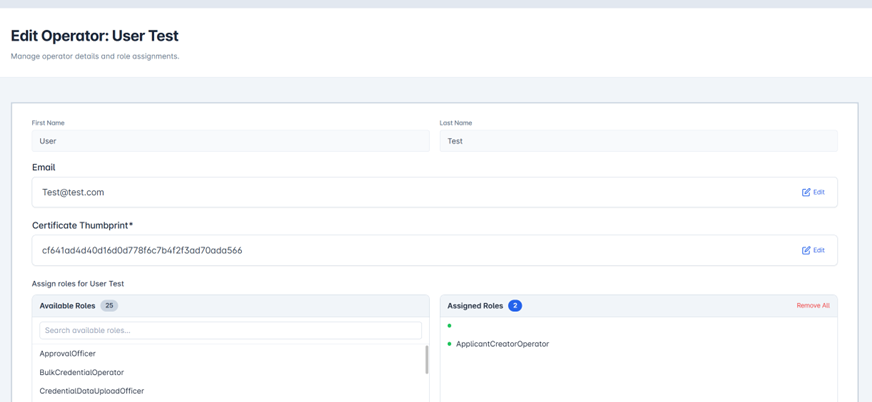 |
5 | Set CMS Server Key Go to Administration, then select the Credential Policy using the gear button, then Configure Policy. Select the Device Issuance tab from credential policy screen and set the CMS Server Key field to NON. | 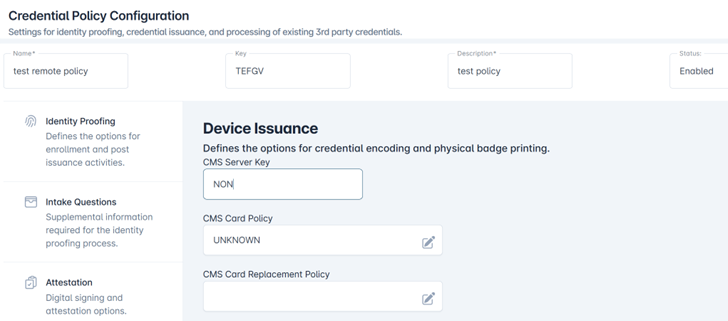 |
6 | Log Out of Application Log out and log back into IDMS to apply the changes. |