
IDMS Setup Wizard Guide
Overview
IDMS is provided as a single Docker image. The first time it starts without a configuration, a setup wizard will open to guide you through the installation. This setup wizard runs only once; it will not appear again after IDMS has been configured.
The installation has six steps. Each step is explained in detail below; click a step to go straight to it. Read the Before You Start section first.
|
Step |
What to do |
|---|---|
|
1. Get the installation file. |
Copy |
|
2. Start IDMS |
Run the |
|
Look in the IDMS log for the one-time setup code and copy it. |
|
4. Run the setup wizard |
Open the setup page in a browser, enter the code, answer the questions, then click install. |
|
5. Import the admin certificate |
Download the administrator certificate from the last wizard screen and add it to your browser. |
|
6. Log in |
Go to the IDMS address in your browser and choose the administrator certificate when asked. |
Setup Options:
There are two ways to run it. Choose one before you start:
|
Item |
(1) Built-in Database ( |
(2) Your own SQL Server ( |
|---|---|---|
|
Intended for |
Evaluation / small sites |
Production |
|
What runs in Docker |
IDMS and a SQL Server Express container |
Only IDMS; it connects to your existing SQL Server |
|
Database server needed |
No |
Yes. Your database administrator creates a setup login first (see "Your own SQL Server only" under Before you start). |
|
Notes |
You choose the SQL administrator password in the wizard. |
Also used to add a second IDMS server to an existing installation. |
Before you Start:
Host
Windows
-
Windows 10/11 (64-bit) with Docker Desktop installed and running, using the WSL 2 engine and Linux containers (the default).
-
At least 4 GB of memory available to Docker (SQL Server alone needs 2 GB). Check in Docker Desktop → Settings → Resources.
-
Ports 443 and 8080 free on this PC. IIS, another web server or VPN software often uses 443. See Troubleshooting if Docker reports "port is already allocated".
-
Internet access to
docker.ioto download the images.
Linux
-
A 64-bit (x86-64) Linux server with Docker Engine and the Docker Compose v2 plugin, version 2.20 or later (
sudo docker compose versionshould print a version). -
At least 4 GB of memory if you use the built-in database (SQL Server alone needs 2 GB).
-
Inbound TCP 443 open to the users who will reach IDMS. Do not open 8080; the setup page is reached through an SSH tunnel (Step 4).
-
SSH access to the server from your workstation, and a browser on your workstation.
-
Outbound access to
docker.io, and to your SQL Server if you use your own.
From CyberArmed
-
A Docker Hub username and read-only access token for the private image.
cyberarmed/idexchange-core. -
The compose file
docker-compose.idms.yml. It already names the IDMS version to install; don't change it to the latest.
Decide the Hostname
The wizard asks for the name users will type in the browser, for example idms.example.com. Use localhost only when IDMS will be used from this machine alone. A wrong hostname causes browser certificate errors; changing it later means resetting the installation.
Your own SQL Server Only
Give your database administrator this list before you start:
-
SQL Server reachable from the IDMS host on TCP 1433 (or the port you use).
-
SQL Server authentication enabled (mixed mode). Windows/Integrated login is not supported.
-
A setup login with
sysadmin, or at minimumdbcreatorandsecurityadmin. The wizard uses it only during setup and does not save it; it can be disabled or have its password changed afterwards. -
Optional: an empty database named
IdExchangecreated in advance, if the setup login may not create databases. -
A real SQL Server (on-premises or on an Azure VM). Azure SQL Database is not supported.
The wizard creates its own limited login for IDMS (idms_app_<random>) with access to the IdExchange database only.
Step 1: Get the Files
-
Create a folder for IDMS and open a terminal in it. The folder name doesn't matter; the compose file names the containers
idms-….Windows (PowerShell):
PowerShellNew-Item -ItemType Directory -Path C:\IDMS -Force | Out-Null Set-Location C:\IDMSLinux (bash):
Bashsudo mkdir -p /opt/idms cd /opt/idms -
Save
docker-compose.idms.ymlfrom CyberArmed into that folder. -
Sign in to Docker Hub with the username and token from CyberArmed. Paste the token when asked for a password; it isn't shown as you type.
Windows (PowerShell):
PowerShelldocker login -u <docker-hub-username>Linux (bash):
Bashsudo docker login -u <docker-hub-username>You should see
Login Succeeded.
Step 2: Start IDMS
-
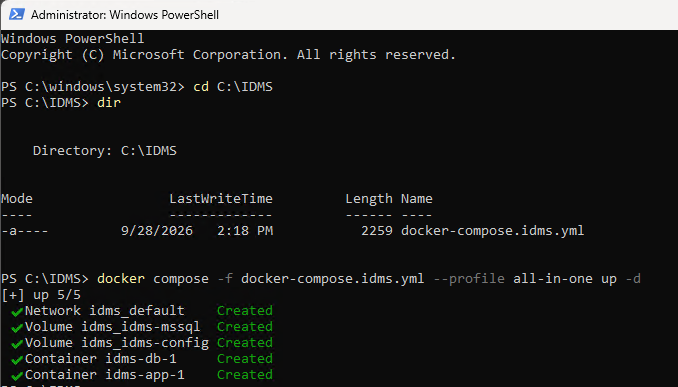
Start the Containers. The first run downloads the images, which can take several minutes.
Windows (PowerShell):
PowerShelldocker compose -f docker-compose.idms.yml --profile all-in-one up -d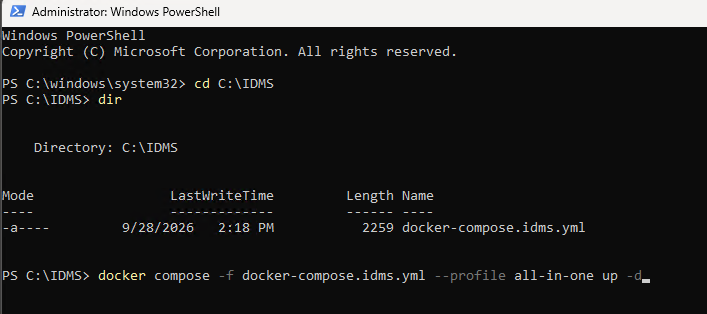
Linux (bash):
sudo docker compose -f docker-compose.idms.yml --profile all-in-one up -d
-
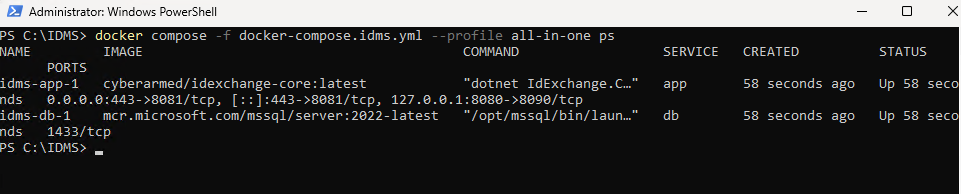
Check they are Running:
Windows (PowerShell):
docker compose -f docker-compose.idms.yml --profile all-in-one ps
Linux (bash):
sudo docker compose -f docker-compose.idms.yml --profile all-in-one ps
You should see app (and db for the built-in database) with status running or Up. Port 127.0.0.1:8080 is the setup page; 443 is IDMS itself once setup is finished.
Warning: finish setup right away. With the built-in database, SQL Server starts with a temporary administrator password until the wizard replaces it. The database isn't reachable from outside Docker, but don't leave a new installation sitting at the setup screen.
Step 3: Find the Setup Code
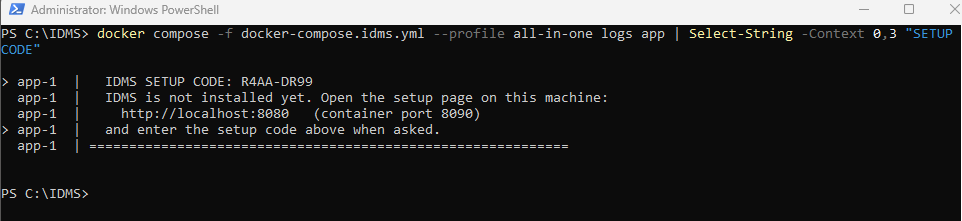
Each time the container starts in setup mode it prints a new one-time setup code in its log. The wizard asks for it, so only someone who can see the log can run setup.
Windows, in Docker Desktop: Containers → expand idms → click app → Logs. Look for the IDMS SETUP CODE banner.
Windows (PowerShell):
docker compose -f docker-compose.idms.yml --profile all-in-one logs app | Select-String -Context 0,3 "SETUP CODE"
Linux (bash):
sudo docker compose -f docker-compose.idms.yml --profile all-in-one logs app | grep -A3 "SETUP CODE"
If nothing is shown yet, wait a few seconds and try again. If you restart the container before finishing setup, use the newest code.
Step 4: Run the Setup Wizard
Windows: open **http://localhost:8080** in a browser on this PC.
Linux: the setup page listens only on the server's own 127.0.0.1, so reach it through an SSH tunnel from your workstation. Leave this command running while you use the wizard (Windows PowerShell and macOS/Linux terminals both include ssh).
On your workstation:
ssh -N -L 8080:127.0.0.1:8080 <your-user>@<server>
Then open **http://localhost:8080** in your workstation's browser. The admin certificate you download at the end is saved on your workstation, which is where you need it.
Note: The setup page uses plain
http. That's expected: it is only reachable from this machine (or through your SSH tunnel), and it is switched off for good once setup is finished.
Screen 1 of 5: Welcome
-
Enter the setup code from Step 3 and click Continue.
-
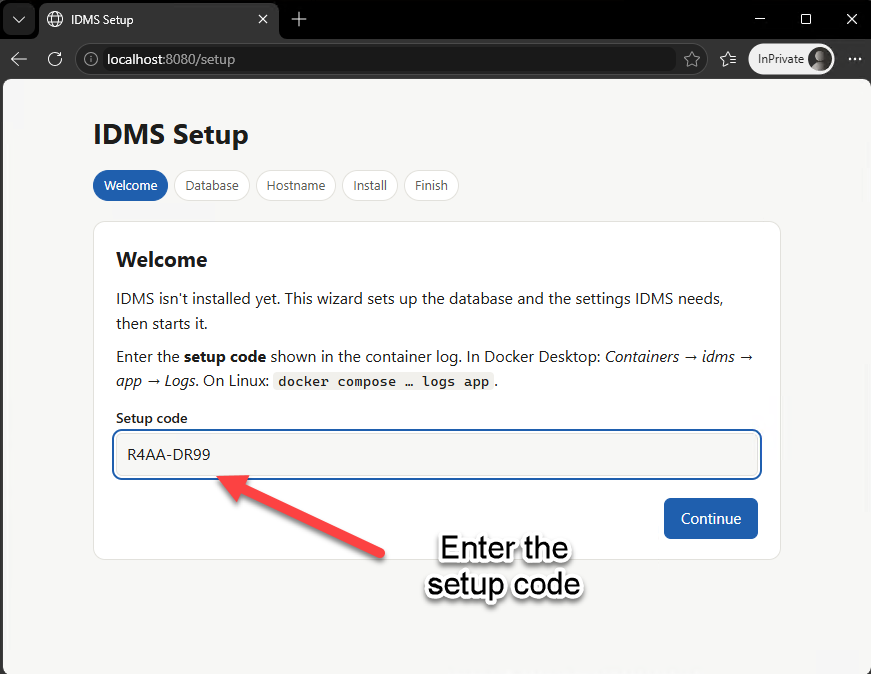
After 5 wrong codes the wizard locks for 1 minute.
Screen 2 of 5: Database
Built-in database (selected by default with all-in-one):
-
Choose a SQL administrator (
sa) password and type it twice. It must be at least 8 characters and contain three of: uppercase, lowercase, digits, and symbols. The wizard checks this as you type. -
Store this password safely (for example in your password manager). IDMS does not keep it; you need it for database backups or maintenance.
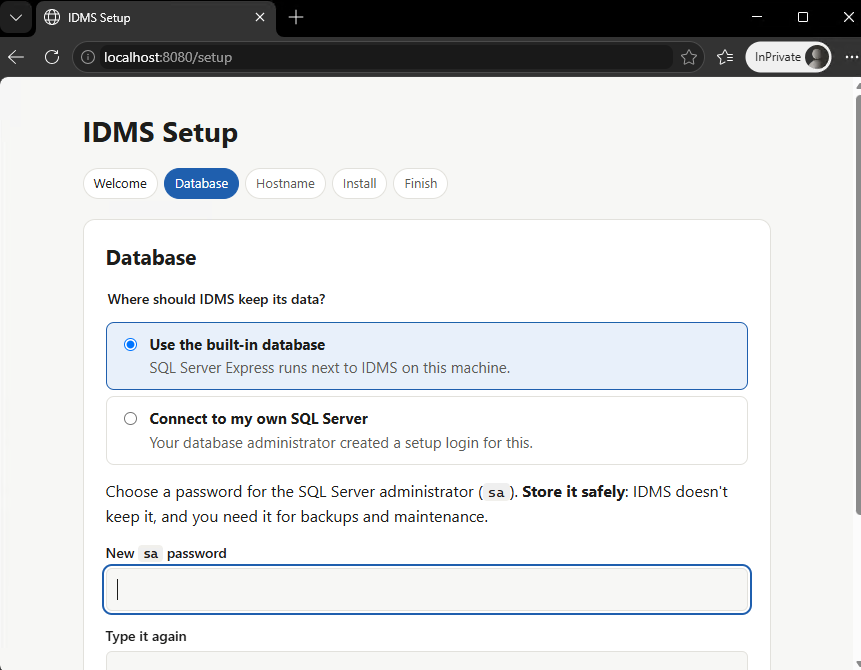
Connect to my own SQL Server:
-
Enter server, port (default 1433), and the setup login and password from your database administrator.
-
Click Test connection. Fix anything it reports before continuing (see Troubleshooting).
-
If the server already has an IDMS database, the wizard offers Join the existing installation. Choose it to add this machine as another IDMS server; the database is not changed.
The database name is always IdExchange.
Screen 3 of 5: Hostname & Web Certificate
-
Hostname: the name users will browse to (see "Decide the hostname"). Defaults to
localhost. -
Web certificate, choose one:
-
Create a certificate: setup creates it, signed by the installation's own IDMS Root CA. Browsers warn until you trust that root (Step 5). Fine for testing and internal use.
-
Upload a certificate: a
.pfxfile with its private key, plus its password. It must not be expired, its name must match the hostname, and it must be valid for server authentication. Use this for production with your own certificate authority.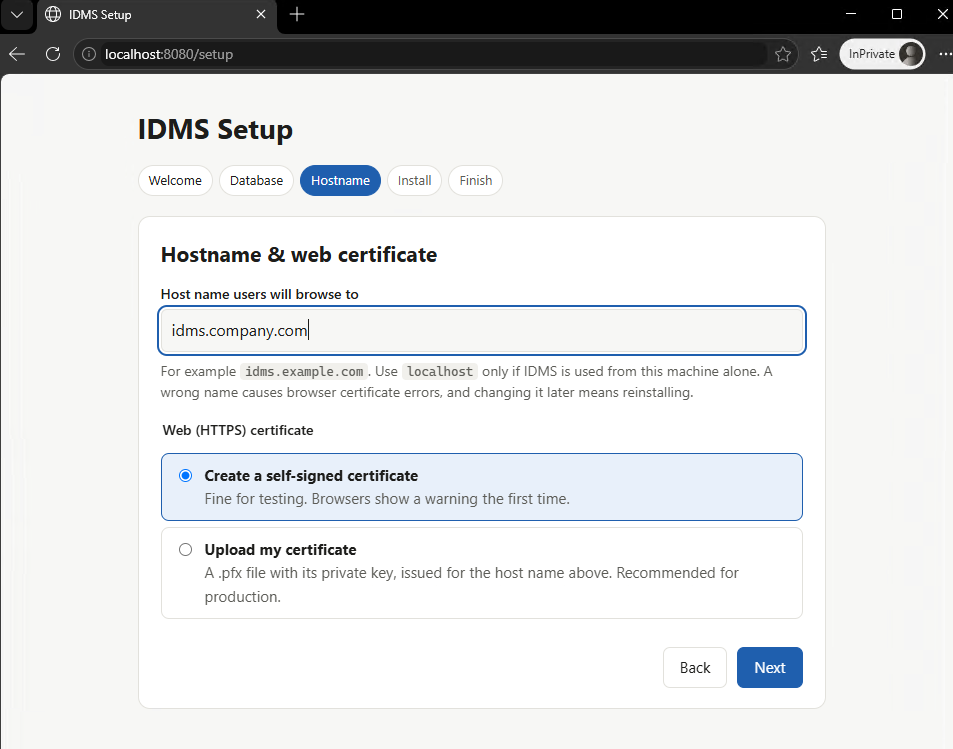
-
Screen 4 of 5: Review & Install
Check the summary and click Install. Each step shows ⏳ while running, ✓ when done, or ✗ with the error:
-
Connect to the database (waits up to 2 minutes while the built-in SQL Server starts).
-
Change the
sapassword (built-in database only). -
Create certificates: IDMS Root CA, web, administrator, and a CMS placeholder.
-
Create the database tables and starting data.
-
Create the limited IDMS database login and check it works.
-
Save the settings.
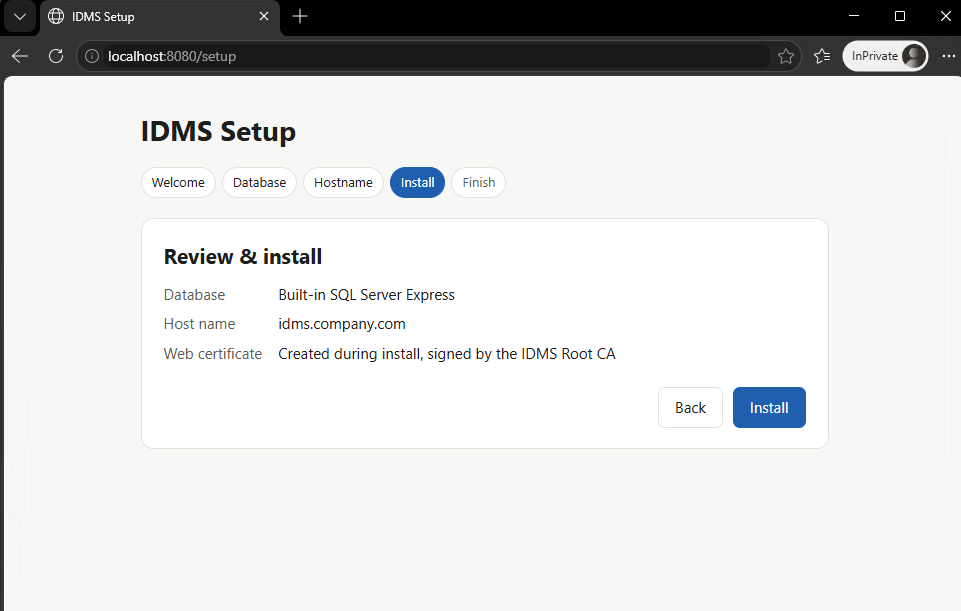
If a step fails, fix the cause and click Retry; it continues from the failed step. Start over removes the IdExchange database only if the wizard created it.
Screen 5 of 5: Finish
-
Click Download administrator certificate. This saves
idms-admin.pfx. -
The certificate's import password is shown once. Copy it somewhere safe now. If you lose it before finishing, click Issue a new certificate; the old one stops working.
-
Optional: under Trust IDMS on this computer, download
idms-root-ca.cer, the single IDMS Root CA that issued both the administrator and the web certificate. Do this before Finish; see Step 5 for adding it to Windows. -
Tick I have saved the certificate and its password and click Finish and start IDMS. Setup is marked complete, the setup page switches off, and IDMS starts.
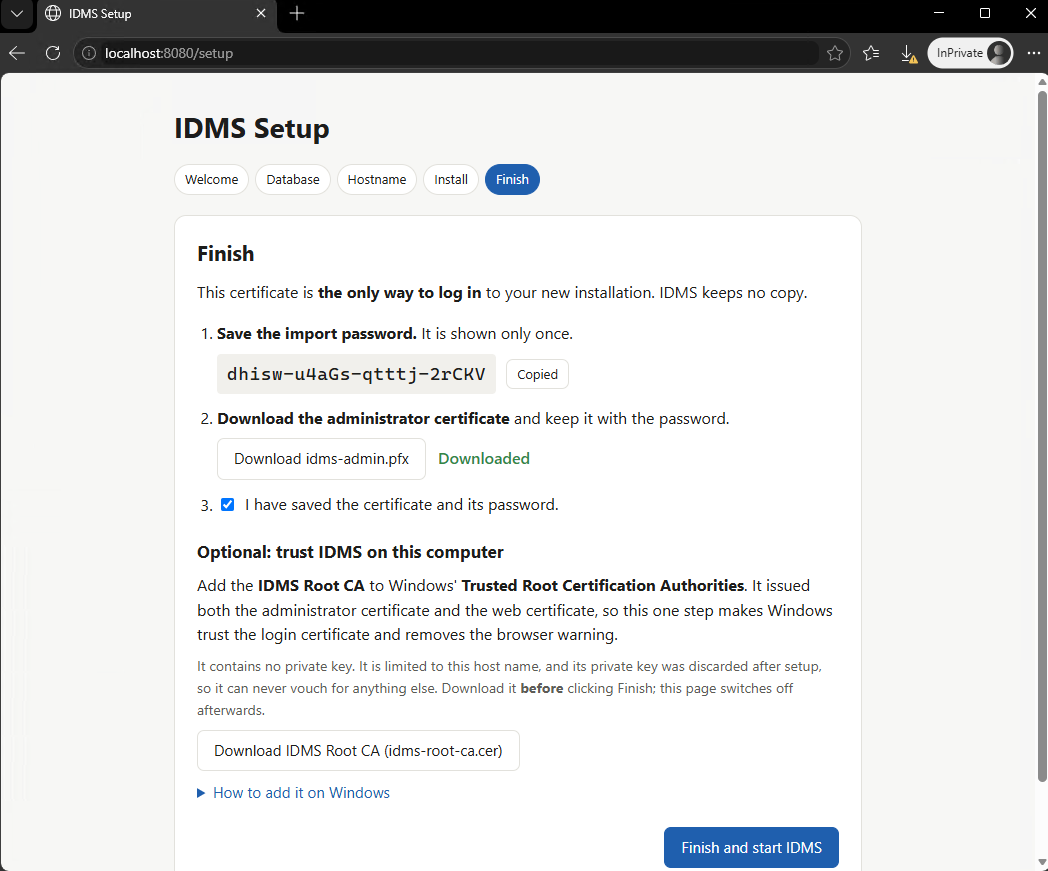
Important: keep the administrator certificate safe. It is the only way to log in to a new installation, and IDMS keeps no copy. Store
idms-admin.pfxand its password as you would any administrator credential. If you lose them before creating other administrators, you will need to reset and reinstall.
Step 5: Import the Admin Certificate
Import idms-admin.pfx into the browser you will use for IDMS. You need the import password from the Finish screen.
Edge or Chrome on Windows
-
Double-click
idms-admin.pfx. -
Choose Current User → Next → Next.
-
Enter the import password → Next.
-
Choose Automatically select the certificate store → Next → Finish.
-
Close all browser windows and reopen the browser.
Or in PowerShell (you are prompted for the password):
Import-PfxCertificate -FilePath "$env:USERPROFILE\Downloads\idms-admin.pfx" `
  -CertStoreLocation Cert:\CurrentUser\My `
  -Password (Read-Host -AsSecureString "Import password")
Linux desktop (Chrome or Chromium)
Import the certificate on your workstation, where the browser runs. On Windows workstations follow the Windows instructions above.
pk12util -d sql:$HOME/.pki/nssdb -i ~/Downloads/idms-admin.pfx
Optional: Trust IDMS (Windows)
If you downloaded idms-root-ca.cer on the Finish screen, add it to Trusted Root Certification Authorities. Windows then trusts the administrator certificate's issuer, and the browser stops warning about the connection (when setup created the web certificate). The file has no private key. The CA is limited to your host name (name constraint), and its private key was discarded after setup, so it can never vouch for anything else.
Import-Certificate -FilePath "$env:USERPROFILE\Downloads\idms-root-ca.cer" -CertStoreLocation Cert:\CurrentUser\Root
Windows asks you to confirm. Or double-click the file → Install Certificate… → Current User → Place all certificates in the following store → Trusted Root Certification Authorities. Firefox: Settings → Certificates → View Certificates → Authorities → Import.
Firefox (any system)
Firefox keeps its own certificates: Settings → Privacy & Security → Certificates → View Certificates → Your Certificates → Import → choose idms-admin.pfx → enter the import password.
Step 6: Log In
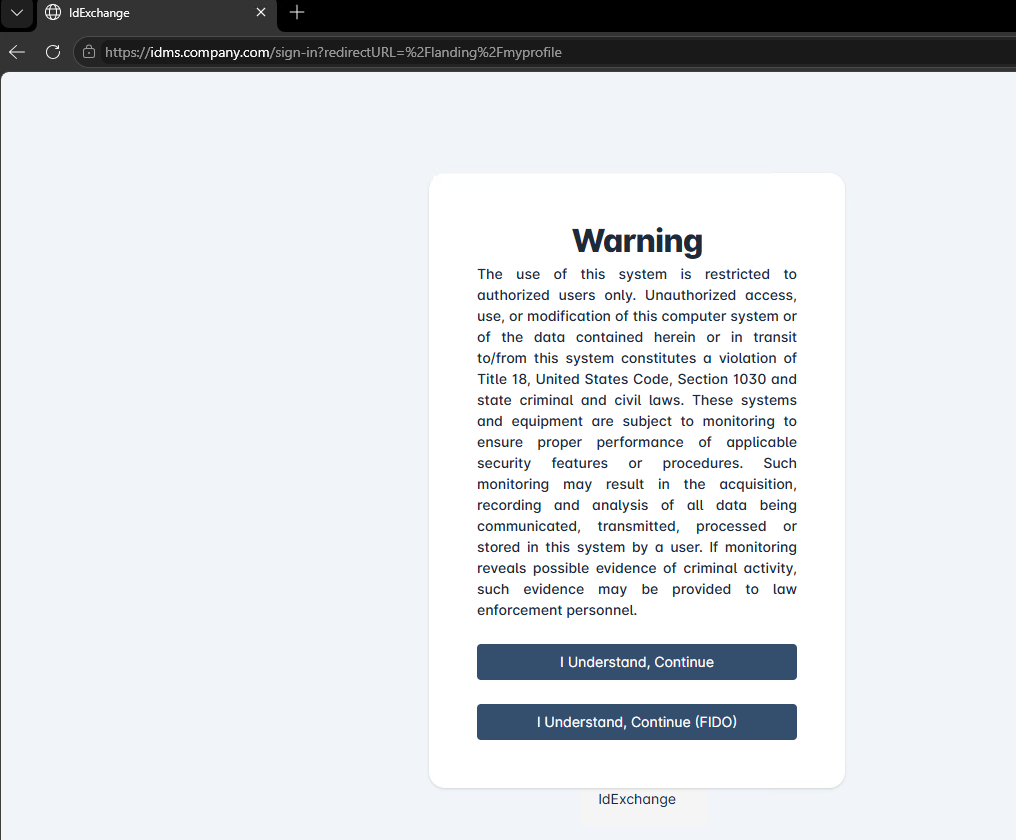
-
Browse to
<https://<hostname>>/(the hostname you entered in the wizard). If you changed the HTTPS port in the compose file, add it, for example<https://<hostname>>:444/.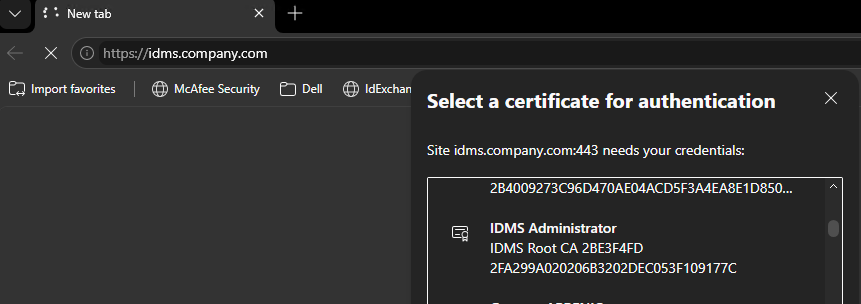
-
If you haven't trusted the IDMS Root CA: the browser warns that the connection isn't private. For testing, choose Advanced → Continue. To remove the warning, trust
idms-root-ca.cer(Step 5); for production, upload a certificate from your own certificate authority. -
When the browser asks for a certificate, choose IDMS Administrator.
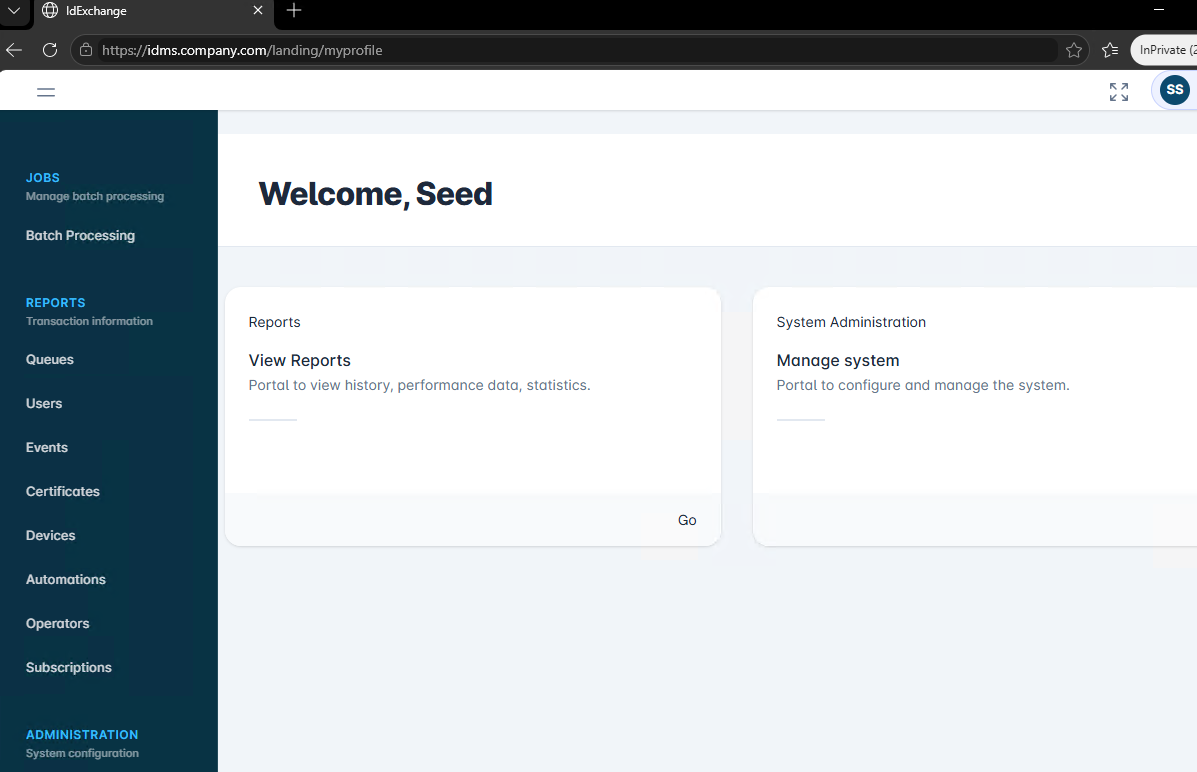
-
You are logged in as the system administrator. Create other administrators and users from within IDMS.
This setup has been completed. For maintenance and post installation support reference Post Installation & Maintenance .