Installing and Configuring the IdExchange MicroService
Installation Requirements
CMS Notification Plugin is installed Installing the CMS Notification Plugin
.NET 4.8
Client certificate issued to the IDMS Operator (installed in local computer certificate store) that will be used by the MicroService
Role assignment of EnrollmentOfficer and NotificationService for the IDMS Operator that will be used by the MicroService
IDMS has the CMS PIV_AUTHENTICATION certificate mapping
To Install the IdExchange MicroService
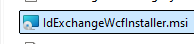
The IdExchange MicroService insteraller is in the IDMS Client\CMS Notification folder and is named IdExchangeWcfInstaller.msi.
Open an administrative command prompt and run the IdExchangeWcfInstaller.msi.
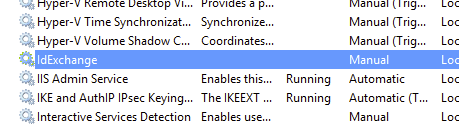
After the installation completes, open the Service snap-in by running services.msc (Windows key + R)
Verify the installation was successful by analyzing the services . If successful, the "IdExchange" will appear in the list.
Configuration Procedures
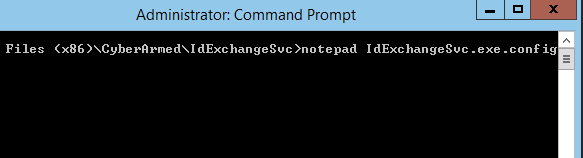
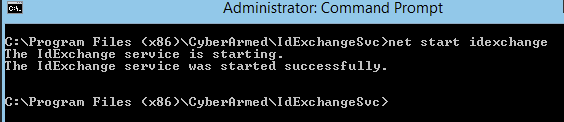
Using an administrative command prompt, go to the C:\Program Files (x86)\CyberArmed\IdExchangeSvc folder
Open the IdExchangeSvc.exe.config with notepad.
Verify the UseMsmq key exists.

With the IdExchangeSvc.exe.config opened, scroll to the bottom to the "AppSettings" section of the file.
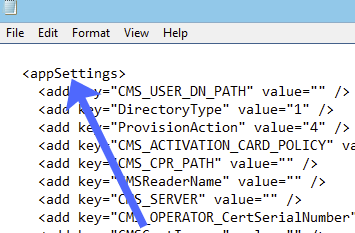
Go to the IdmsOperatorSerialNumber and insert the certificate serial number of the client certificate

Next, go to the WebAPIURL key and update the DNS value to the value of the IDMS DNS.

Save the IdExchangeSvc.exe.config file and close.
Log into to the IDMS, Administration → Operators and add/update the account with the thumbprint from the certificate configured in the previous step.
In the command prompt, enter "net start IdExchange".
View the in the c:\temp\idexchange-service.txt logs to verify the service started properly.