Enrolling an Applicant's Photo and Identity Documents
How to Enroll an Applicant’s Photo and Identity Documents
The following describes the process to enroll an applicant’s photo and applicable identity proofing documentation. In this step the applicant submits identity-proofing documents (i.e. photograph) and biometric data as required for credential issuance.
This step ensures the person requesting the badge is who they claim to be and occurs prior to the approval process.
Note: configured credential policy determines identity proofing requirements for capture.
Prerequisites
Roles: At a minimum, the officer must have the Enrollment Officer permission.
Software: The PivIT browser extension and middleware must be installed.
The user should be already added to the IDMS. If not, please reference and complete. Adding an Applicant
A physical smart card is required for enrollment because the smart card will digitally sign the enrollment package. Only perform this transaction if using a smart card.
Procedure to Enroll User’s Identity Documents
Item | Procedure | Example |
|---|---|---|
1 | Within the Identity Proofing section, click Manage. | 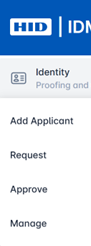 |
2 | Enter the user’s Employee ID or exact Last Name and press Search. | 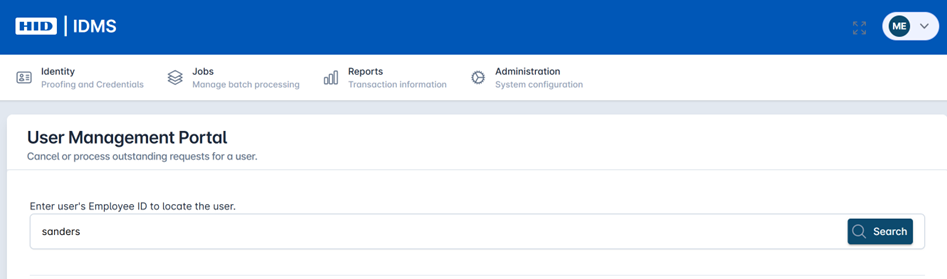 |
3 | Find the user from the table and select the Enroll button. The user detail screen will display. Review the user’s information to ensure the correct person is being enrolled. | 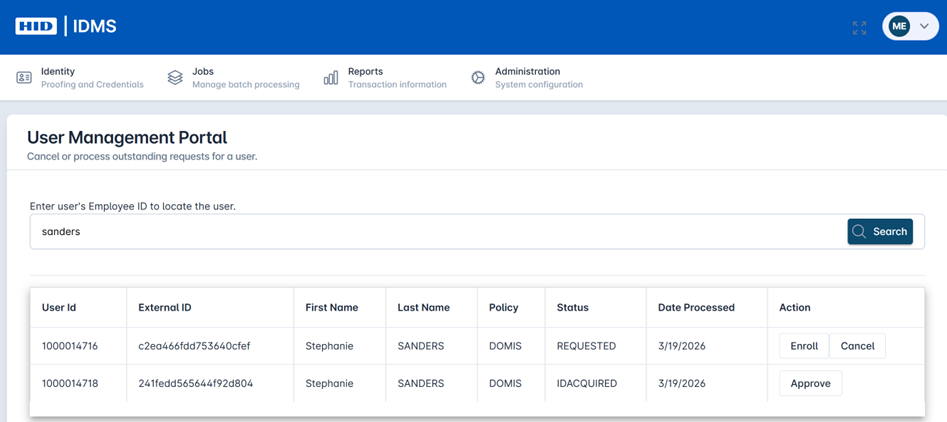 |
4 | Photo Collection Begin the document capture process to first capture the user’s photo. Note: If the browser asks to use the camera, select Allow this time. Position the person in the center of the view finder and press the Take Photo button. The facial recognition software will assist with improved image capture. The user’s photo will appear in the photo screen. If you wish to retake the image, select the Capture Photo button again to relaunch the camera. If policy allows you can upload a photo using the Upload Photo button. Once the file is selected and uploaded, you can view the image. Then select the Next button to progress. | 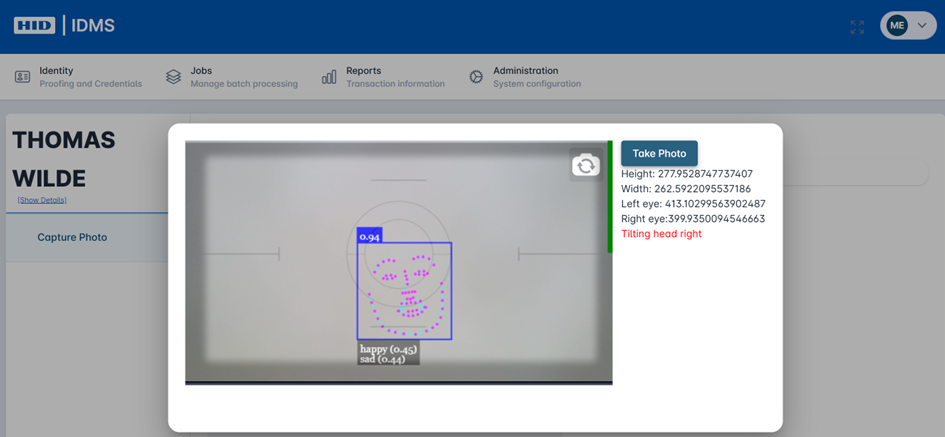 Guided image capture 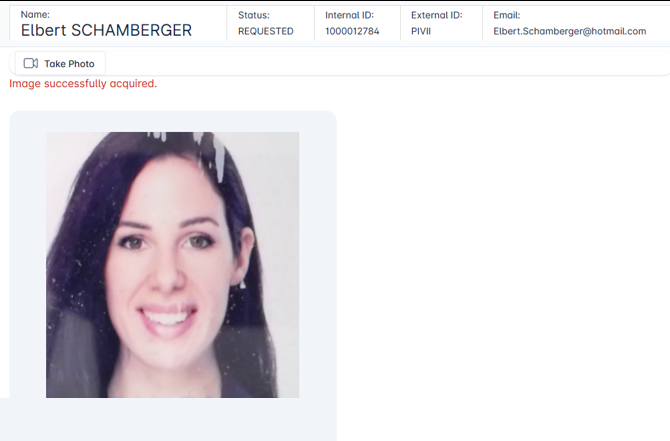 Preview of captured image 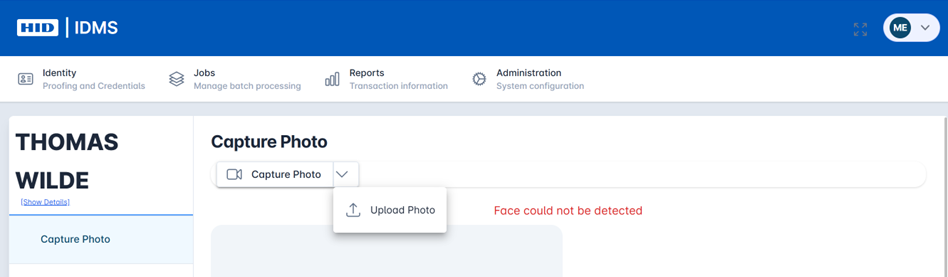 Uploading a photo |
5 | Other Document Collection Select the Press to Capture Document button to begin the document capture process. Select the document type from the drop-down and then press Scan Document to take a snapshot of the document or press Upload Document to load a document that has been scanned in. After the document is captured select Save. | 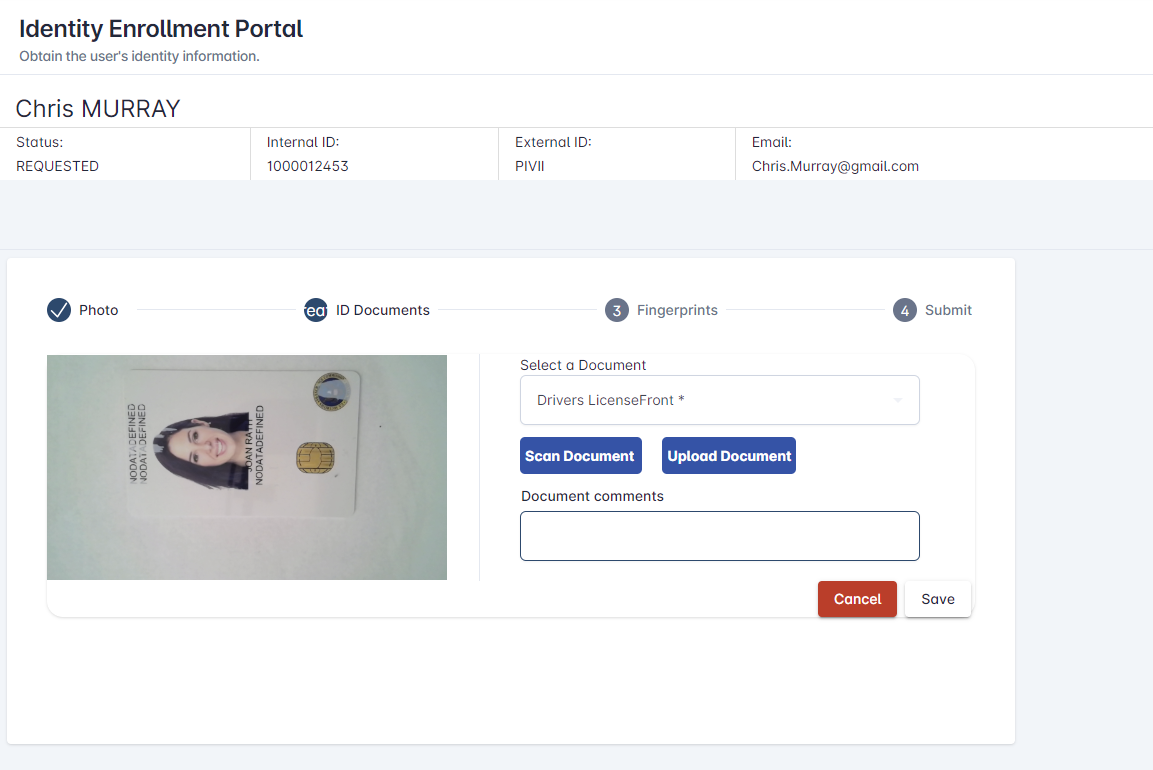 |
6 | If taking a photo of the document, position the camera so it is pointed at the document, and the document is clearly viewable in the camera view finder. When complete, press Take Photo. Select Save. | 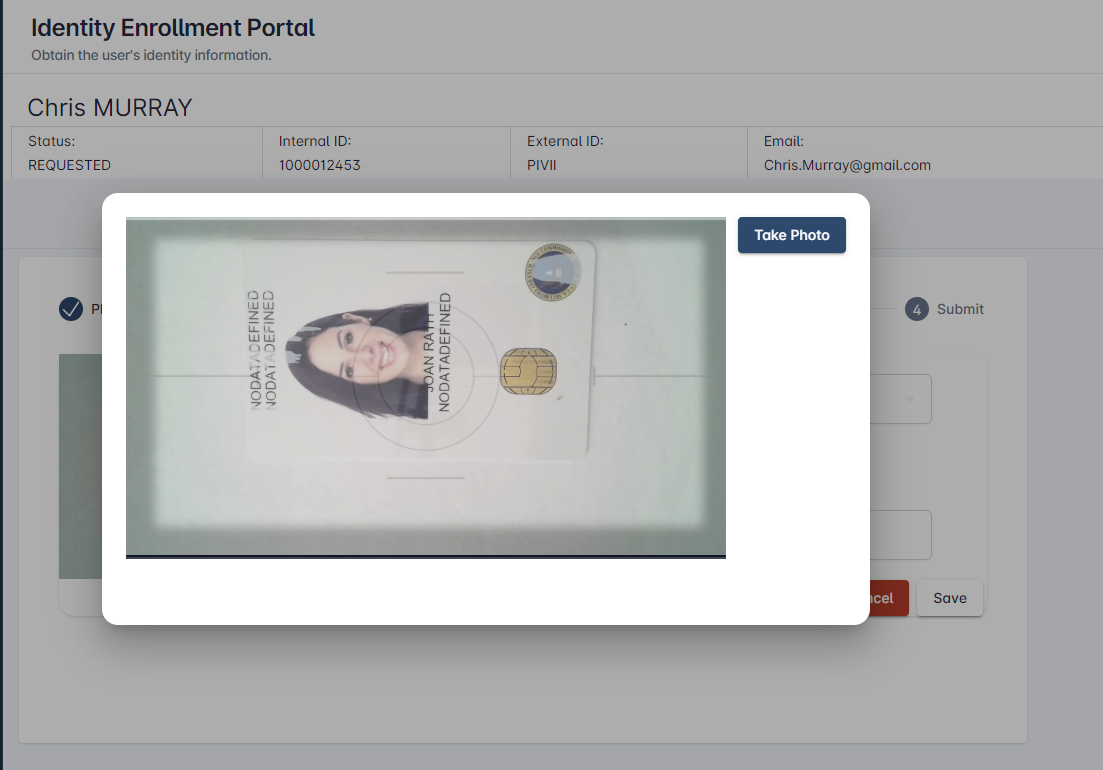 |
7 | Repeat the process above for any additional document capture requirements. For example, a second document may be required per the organization’s identity proofing policy. Note: Review the stored documents to ensure proper capture prior to submission. | 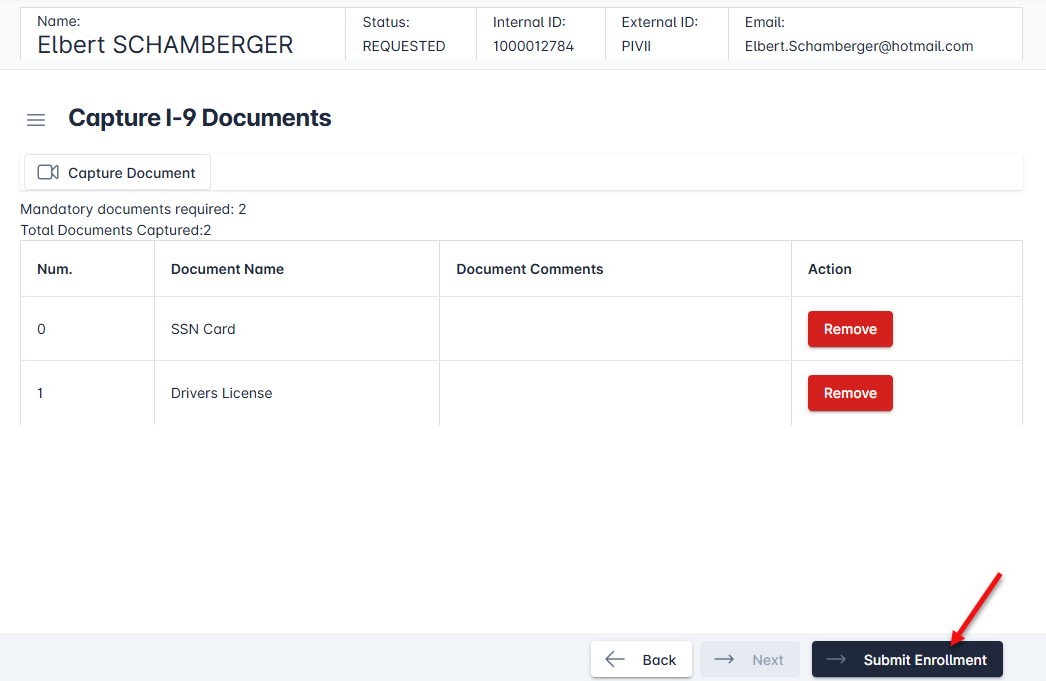 |
8 | When document capture is complete, press the Submit Enrollment button. The enrollment package will be submitted. | 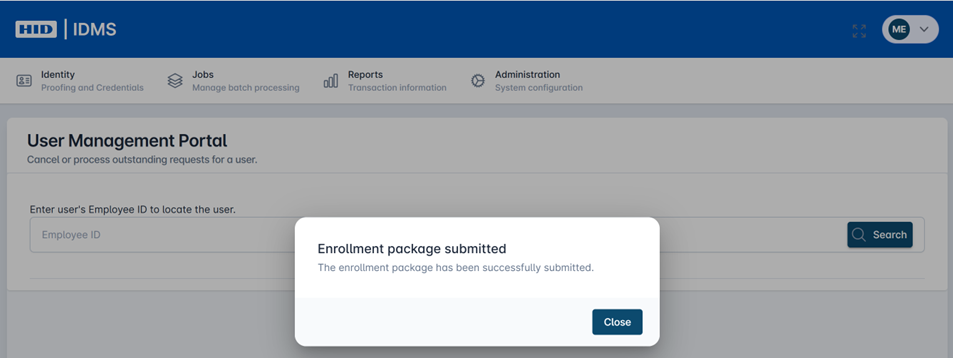 |
Note: If using a separate camera, ensure the camera is plugged in properly for clear image capture; a poor connection could result in an unclear image. If needed, unplug and reconnect the camera to establish a stronger connection.
Capturing the Applicant’s Handwritten Signature
This procedure outlines the steps for capturing a digital signature from an applicant during the enrollment process using a Topaz signature pad. The digital signature serves as an attestation of their agreement to the presented terms and conditions.
Item | Procedure | Example |
|---|---|---|
1 | Access the Signature Page Once you have advanced to the signature page of the enrollment wizard, you will see the Subscriber Agreement terms on the left side of the screen. The signature area is on the right. | |
2 | Start the Signature Capture Process
Result: A pop-up dialog titled ‘Topaz SigPlusExtLite’ will appear on the screen, showing the signature pad's connection status. The status will change to ‘Pad initialized, start signing’. |  |
3 | Capture the Signature
Result: The pop-up dialog will close, and the captured signature will be displayed in the signature box on the main screen. | 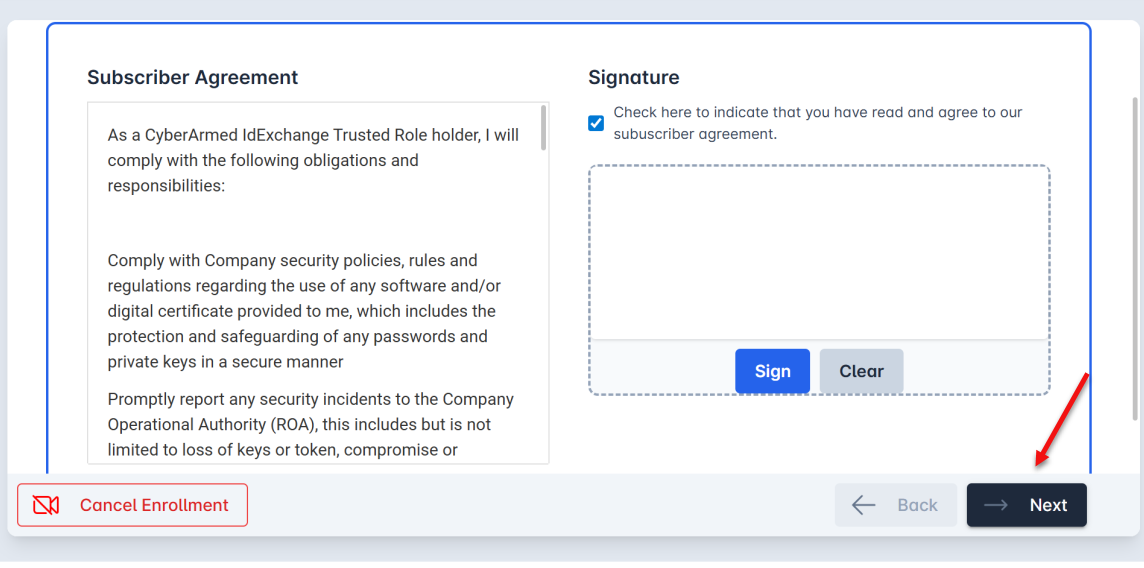 |
4 | Complete the Process
|  |