ID Proofing Workflow
Understanding organizations may have different policies for their credentialing needs, IdExchange supports different identity proofing and credentialing workflows to support a wide range of proofing needs. Out of the box, preconfigured workflows allow organizations to implement PIV, PIV-I and CIV ID enrollment and credential encoding policies.
ID Proofing Policy Configuration
Using the ID Proofing Configuration page, the organization can configure very specific ID proofing rules for their given security requirements. While some organizations may want to implement the full PIV process, where biometrics and documents are captured, some organizations may only decide to capture the user's photograph.
Below are the configurable options that can be captured for identity proofing under a specified credential policy.
Item | Capture Setting | Description |
|---|---|---|
1 | Photo | This setting will force the application to take the photograph of the user being processed for a credential. |
2 | Fingerprints | This setting will force the application to take the fingerprints of the user being processed for a credential. |
3 | I-9 Documents | This setting will force the application to capture the I-9 documents of the user being processed for a credential. |
4 | Physical Signature | This setting will force the application to capture the Physical Signature of the user being processed for a credential. |
5 | IRIS | This setting will force the application to capture the IRIS of the user being processed for a credential. |
6 | Capture Date of Birth | This setting will force the application to capture the user’s date of birth. |
To Configure the ID Proofing Workflow
An administrator can follow the below process to configure the identity proofing settings for a credential policy as aligned with organizational needs.
Item | Procedure | Example |
|---|---|---|
1 | Click Administration and select Credential Types. | 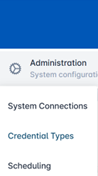 |
2 | Select a Credential Policy and press the corresponding gear button. Press Configure Policy. |  |
3 | When the Credential Policy Configuration screen opens to the Identity Proofing tab. In the Identity Proofing section, use the radio buttons to configure each parameter on or off. | 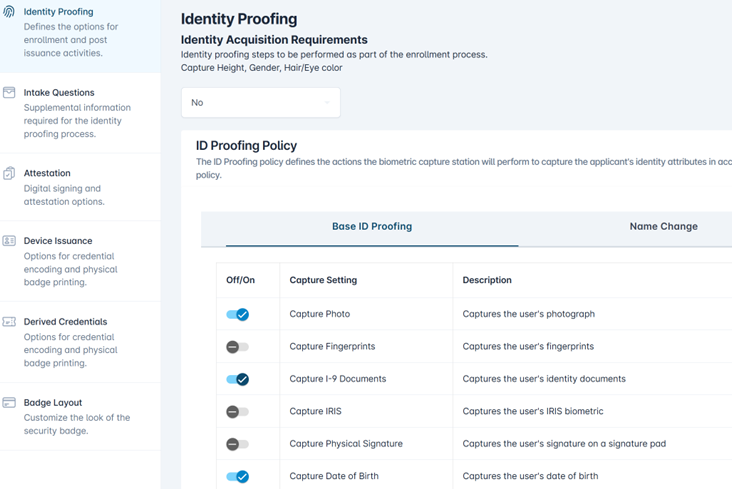 |
4 | Scroll down to the Document Requirements section. Add or Delete the documents that should be captured as part of the process for the credential policy. | 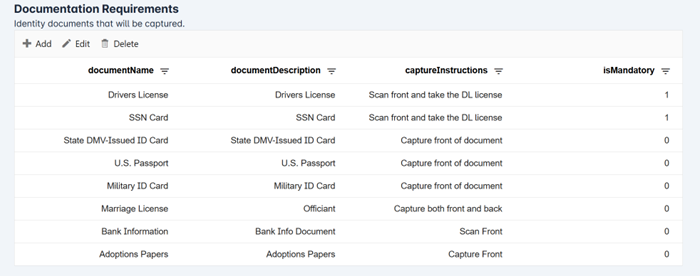 |
5 | Once complete, press the Save Changes button. You will be prompted to select Confirm to apply the policy changes. | 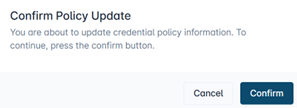 |