Adding an Applicant
How to Add a New Applicant
This guide provides a step-by-step procedure for adding a new applicant to the system to begin the identity proofing and credential enrollment process.
In this step the applicant is registered in the system, creating their initial user record with basic demographic information.
Prerequisites
You must have successfully logged into the IDMS application.
You must possess the Applicant Creator Operator role.
The IdExchange Applicant Directory system has been added to the system connections. APLCNTLDAP
Procedures
Item | Procedure | Example |
|---|---|---|
1 | Navigate to the Add Applicant Section | 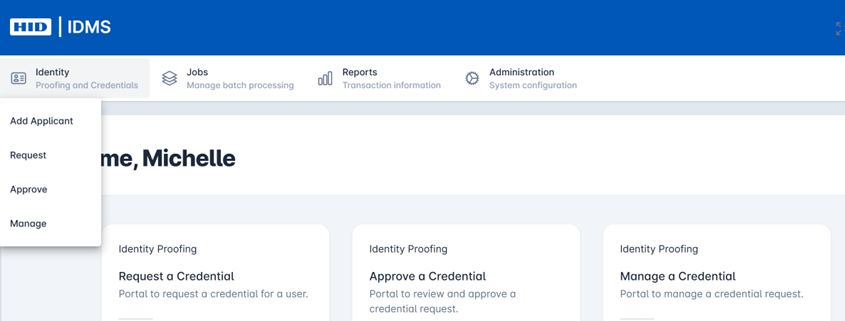 |
2 | Select the Credential Type In the CREDENTIAL TYPE dropdown menu, select the policy type for the credential you want to request. For example, select PIVII - Policy for PIV-I enrollments/ Note: different data elements will be required based on policy selected | 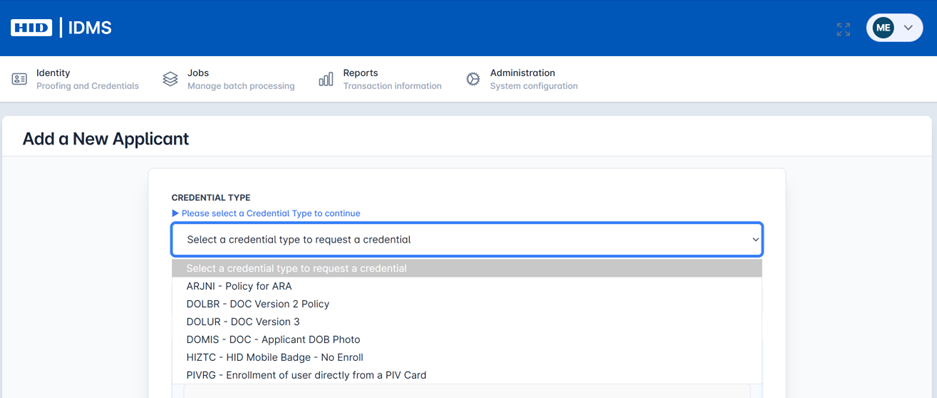 |
3 | Enter the Applicant Information Fill in the applicant's personal information in the following fields
Note: policy settings dictate additional fields | 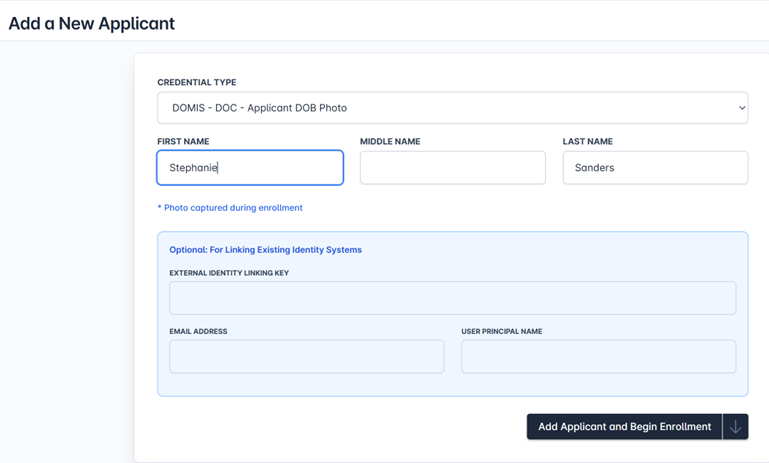 |
4 | Add the Applicant After you have entered all the required information, click the Add Applicant and Begin Enrollment button at the bottom of the form. The screen will load to the next screen allowing the photo and or further documentation to be captured Note: policy settings dictate documentation capture requirements |  |
5 | Capture Initial User Documentation Complete photo capture process or upload photo (as allowed). To take a picture, select the Capture Photo button to start the camera. Ensure user is centered in the screen and capture the image. The face detection software helps capture a centered image. You can also upload a photo by selecting the Upload Photo button and choosing the correct photo to upload. Once complete you will receive a message the photo successfully uploaded. | 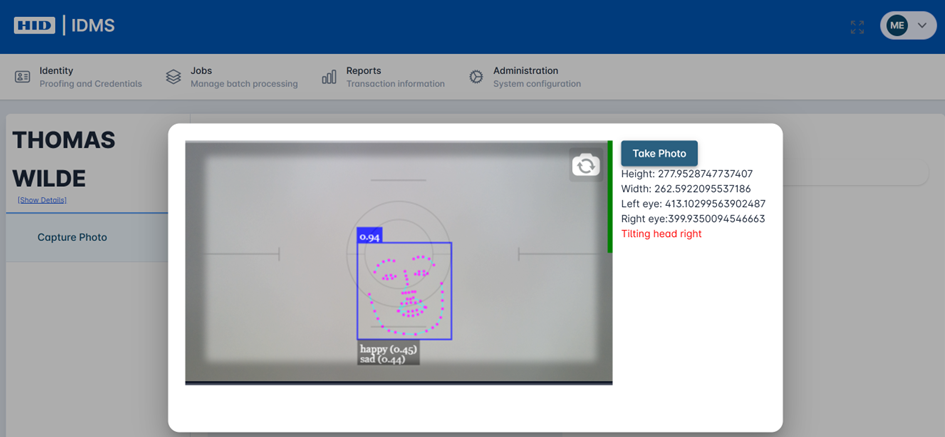 Capture Photo 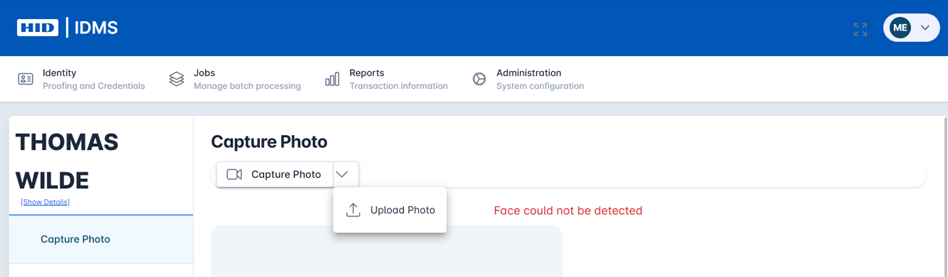 Upload a Photo |
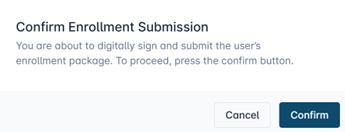
6 | Complete User Enrollment To complete the user enrollment, review the photo. Select the Submit Enrollment button to complete the user Enrollment. You will be prompted with a message confirming you want to digitally sign and submit the user’s enrollment package. Press Confirm. |
 |
7 | User is Enrolled in the IDMS. | 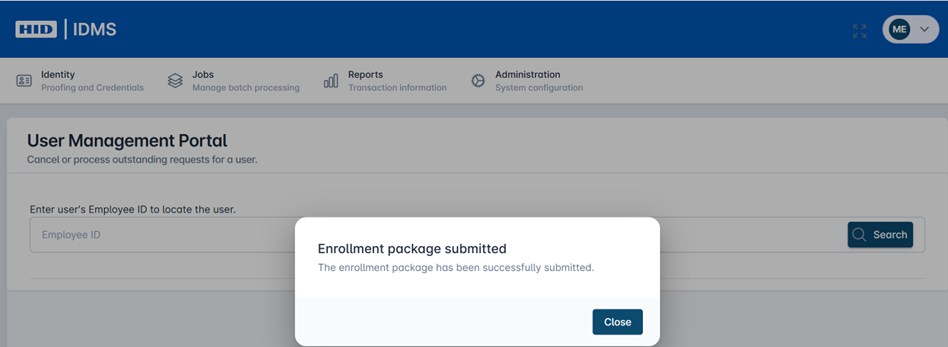 |
Credential policy dictates what user information and further documentation are required for capture.
Once the user is enrolled, you can search for them under the Manage screen to complete the Approval process. The user enrollment has been digitally signed and complete.